Today marks the beginning of a thrilling new chapter in our trading journey as we explore the golden avenues in this XAUBOT Review. I have been tracking this remarkable trading robot for a considerable period, and the time has finally come to delve deeper and share my firsthand experience with all of you. Buckle up as we embark on this exciting adventure together, unraveling the mysteries and potentials that lie within the world of XAUBOT.
Setting the Stage
Before we dive in, let me share a bit of background on how I approach new trading tools. Over my decade-long journey in the blogging sphere, I have cultivated a practice of patience and meticulous analysis. It is a rule of thumb for me to observe a trading robot’s live performance for a minimum of six months before even considering investing my time and resources. The XAUBOT has not only caught my attention but held it, showcasing a promising track record over the past half-year.
XAUBOT Review: A Closer Look at the Performance
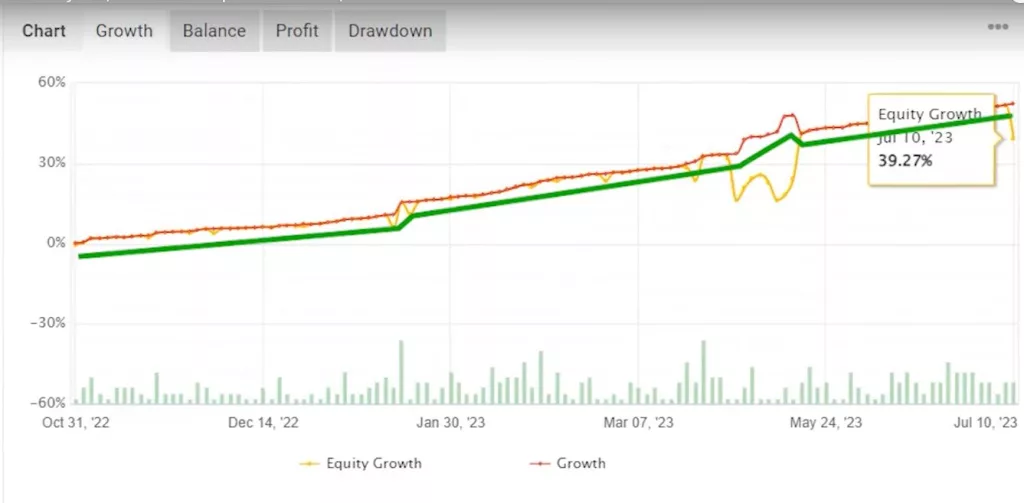
The XAUBOT started its journey with a humble amount ranging between $1600 and $1700. Fast forward six months, and the account balance has soared to a whopping $1,900, translating to a gain of around 40%! It’s important to note that the journey wasn’t all smooth sailing; the drawdown reached nearly 20%. However, in the grand scheme of things, this golden robot has demonstrated a steady and promising performance.
Analyzing the Numbers
Now, let’s break down the numbers that make XAUBOT stand out in the crowded market of trading robots. The profit factor, a critical metric in trading, is an impressive 2.78. To put it in simple terms, this number is derived from dividing the total profits by the total losses. A profit factor above one is a green signal, indicating a profitable strategy. Hence, a score nearing three is nothing short of fantastic, painting a promising picture for potential investors.
XAUBOT Review:Monthly Performance Breakdown
To give you a more detailed insight, let’s dissect the monthly performance since its inception in October 2022. November was a fruitful month with gains surpassing 5%. January stood as the champion, stealing the spotlight with the highest gains. In recent times, the account has been maintaining a consistent performance, with returns oscillating between 2% and 5%.
Testing the Waters with XAUBOT
As your trusted blogger with a decade of experience, I believe in testing the waters myself. I am all geared up to install this expert advisor and run it on a virtual account, ensuring a risk-free exploration. The XAUBOT generously offers a free account for enthusiasts like us to get a taste of its capabilities without any financial commitments.
XAUBOT Review: Step-by-Step Guide to Getting Started
If you are as excited as I am to start this journey, here is a simple guide to setting up your XAUBOT account:
- Sign Up for Free: Begin by clicking on the link provided below. You will find a variety of subscription options to suit your preferences, including a 15-day free trial to get you started without any hitches.
- Smooth Checkout Process: Once you’ve chosen your plan, proceed to the easy checkout process. Fill in your billing details, and you’re almost there!
- Download and Set Up: After receiving confirmation of your order, you will get access to the XAUBOT file. Download it, and you are ready to dive into the golden world of XAUBOT trading.
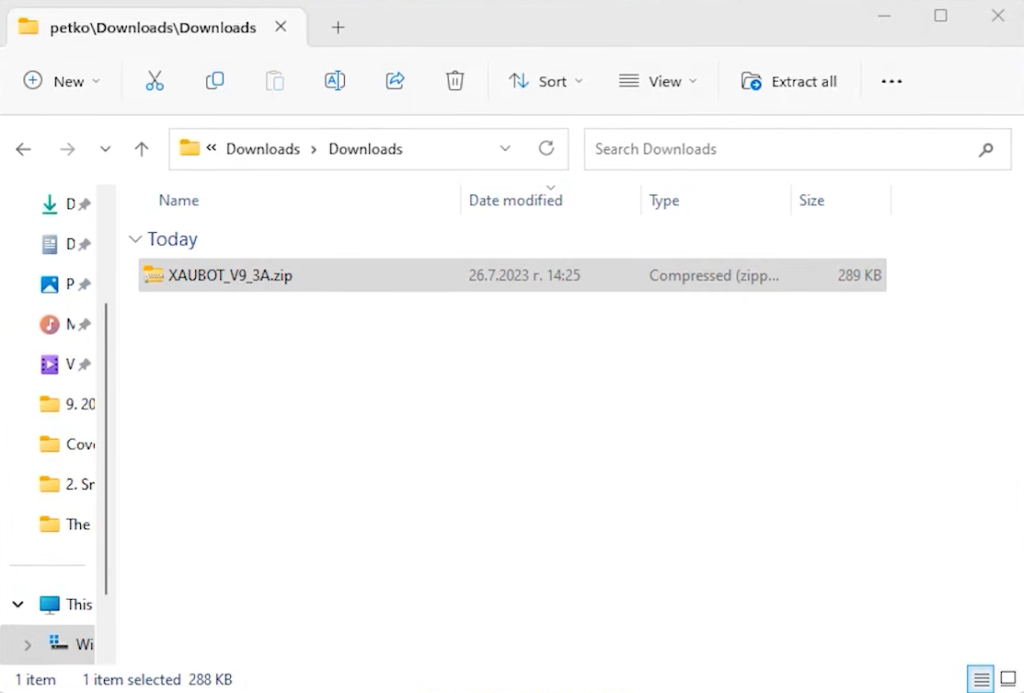
Downloading and Extracting the File
First things first, I downloaded a zip file containing the necessary elements for the setup. Next, I extracted it to find the EX4 file. This file is crucial as it needs to be copied and pasted into my Metatrader account.
Using a Regulated Broker
For this XAUBOT review, I chose to use FXView, a regulated broker that I trust. It’s essential to use a broker that offers low spreads, especially when trading with robots.
XAUBOT Review: Installing the Expert Advisor
To install the expert advisor, I opened the data folder in FXView and navigated to MQL4, followed by experts. Here, I pasted the EX4 file. After this, I refreshed the expert advisors section to see the newly added file.
Setting Up Web Request Options
The next step was to set up web request options according to the detailed PDF guide provided by XAUBOT. This guide is beginner-friendly, explaining how to open and log into your account, and how to set up the expert advisor. Following the instructions, I enabled web requests for a specific URL, which involved pasting a link into the settings.
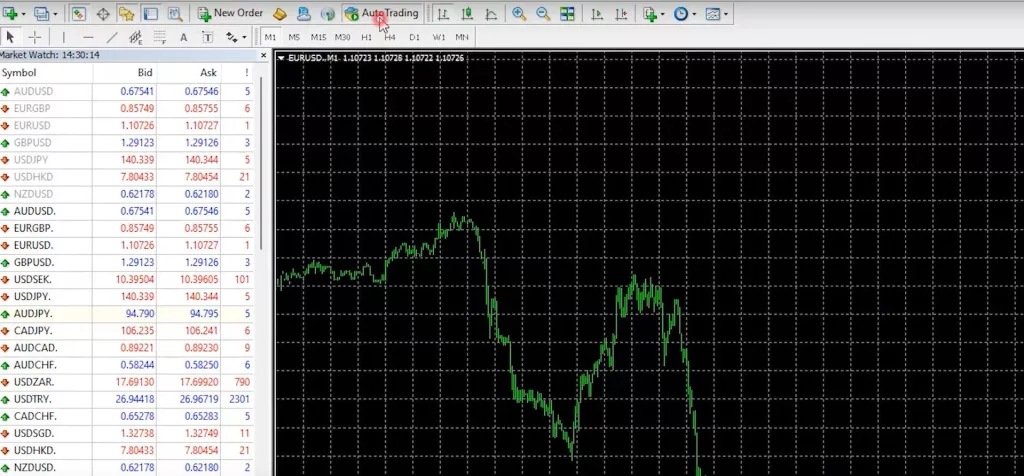
XAUBOT Review: Enabling Auto Trading
After setting up the web request options, I enabled auto trading and opened a new chart with the XAUUSD symbol. I chose the M5 time frame as recommended in the manual.
Dragging and Dropping the Expert Advisor
Next, I dragged and dropped the expert advisor onto the chart. In the common settings, I allowed DLL imports to proceed with the setup.
XAUBOT Review: Understanding the Importance of Low Spreads
Before diving into the inputs, I want to emphasize the importance of low spreads when trading with robots. Select a broker that offers a spread of about 19-20 cents on the gold price, which is quite favorable.
XAUBOT Review: Setting Up with a Small Account
If you’re starting with a small account, say 200 euros, it’s vital to trade lots accordingly to maintain a balanced approach.
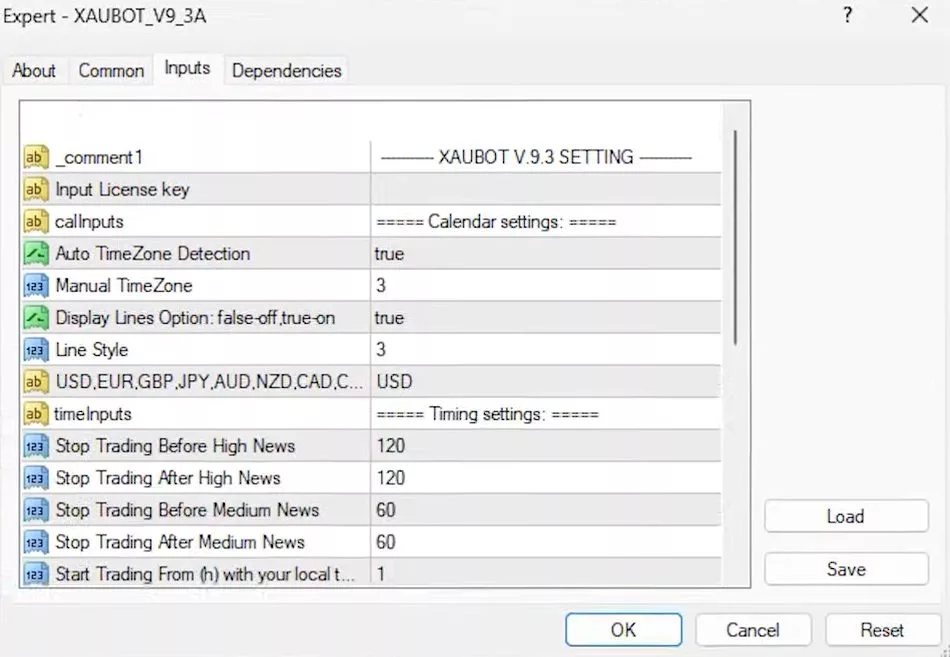
Navigating the Expert Advisor Inputs
Moving on to the expert advisor inputs, the XAUBOT automatically detects your time zone, which is a handy feature. You also have the option to display lines and choose from different currency pairs for trading.
XAUBOT Review: Referring to the Manual for Help
If you find yourself confused at any point, refer to the manual. It contains detailed sections explaining each input, helping you make informed decisions.
Adjusting Timing Settings
Lastly, the XAUBOT review wouldn’t be complete without mentioning the timing settings. You can set it to stop trading two hours before high-impact economic news and resume two hours after. This feature helps in avoiding trading during volatile periods.
XAUBOT Review: Customizing Trading Session Hours
The expert advisor also allows you to customize trading session hours. If you prefer not to keep your trades open overnight or wish to stop trading an hour before the day ends, you can adjust these settings in the inputs.
Understanding Order Settings
Diving right in, I explored the order settings in the manual. I discovered an interesting feature: the option to close orders on a new event. This means the bot can close positions, even those at a loss, before high-impact news events. You can even choose to close a percentage of the total amount, allowing some of the position to remain open during news events.
XAUBOT Review: Setting Up Stop Loss Parameters
Next, I learned about setting a hidden stop loss based on a specified percentage of the account balance. For instance, setting it at 25% means trades will close if the balance drops to this level. For accounts under $600, a minimum drawdown of 50% is recommended. The developers advise keeping the drawdown below 20% for a safer trading experience and encourage regular profit withdrawals.
Choosing a Risk Level
Then, I focused on risk levels. The XAUBOT offers three levels: low, medium, and high, utilizing two, five, and twelve strategies, respectively. The medium risk, recommended for starters, seemed like a balanced choice for me.

XAUBOT Review: Determining Lot Size
Moving on to lot sizes, I found that the EA can control the size automatically, a setting I decided to stick with to test the bot’s full potential. However, if you prefer, you can manually set the default lot size.
XAUBOT Review: Installing Indicators and Setting Up the Expert Advisor
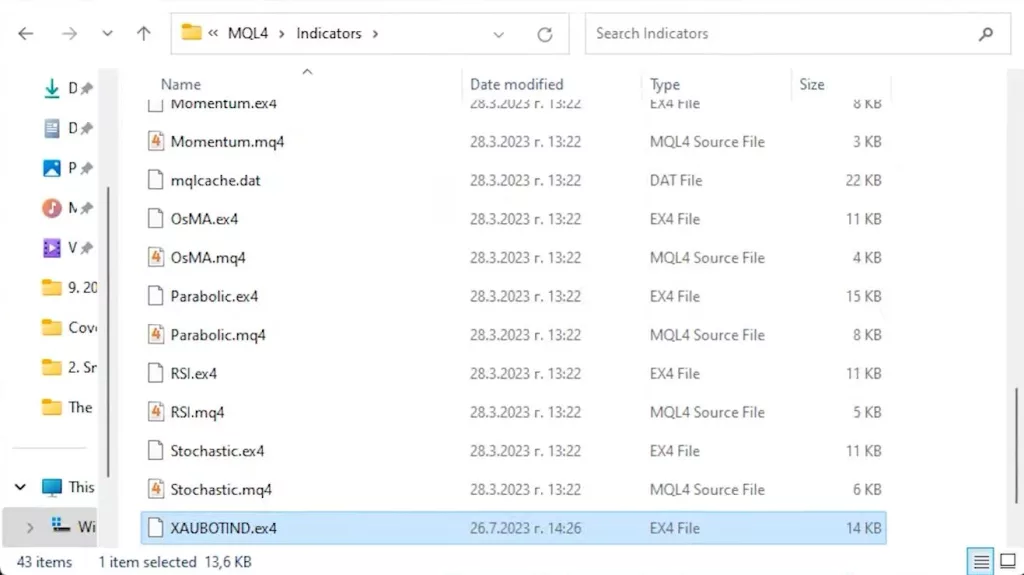
Adding the XAUBOT Indicator
During the setup, I encountered a prompt to add the XAUBOT indicator. Following the alert, I copied the indicator file and pasted it in the MQL4 indicators folder, refreshing to make it visible.
Attaching the Expert Advisor
Next, I dragged and dropped the indicator onto the chart, using the default settings. The only additional step was entering the license key received via email.
Observing the Platform Overview
Once set up, I noticed changes in the platform overview, highlighting upcoming high-impact economic news. It’s a handy feature to stay updated on significant events affecting the trading landscape.
XAUBOT Review: Exploring Additional Resources and Final Thoughts
Utilizing a broker’s Calendar
I also explored the broker’s calendar, a detailed tool offering global economic news. It allows filtering news based on regions, a useful feature for targeted trading strategies.
XAUBOT Review: Affordable Subscription Options
Lastly, I appreciated the XAUBOT’s affordable subscription options, including monthly payments, which provide flexibility for testing the bot over several months before committing to a yearly subscription.
Conclusion
In conclusion, this XAUBOT review has guided you through the meticulous setup process, highlighting the bot’s unique features such as the order settings and risk management options. The XAUBOT stands out with its user-friendly interface, offering a range of risk strategies and the flexibility to control lot sizes. Moreover, it integrates seamlessly with platforms like FXView, enhancing your trading experience with additional resources such as a detailed economic calendar. Whether you are a beginner or a seasoned trader, the XAUBOT caters to all, promising a trading experience that is both safe and optimized. Stay tuned as I venture further with the XAUBOT, eager to see if it meets my expectations in the dynamic world of trading.