In this lecture, I will share with you how you can create and sell your own NFT art and become a seller. So even if you’re not an artist, you can give it a try. Just what I will demonstrate in this lecture is for educational purposes. I’m not an artist, but I will show you step by step how to create an NFT and how to sell it on OpenSea, one of the most popular platforms.
And as well, you will see all the fees. And I will share with you again some pros and cons, as I always like to do. So we can have a realistic idea about it. And you will know if this is the right thing for you.
If you are an artist and you want to get started as soon as possible, listing an NFT on OpenSea or any other platform, I will show it to you right away. So let’s go for it.
Table of Contents:
How to Create an NFT Art Collection
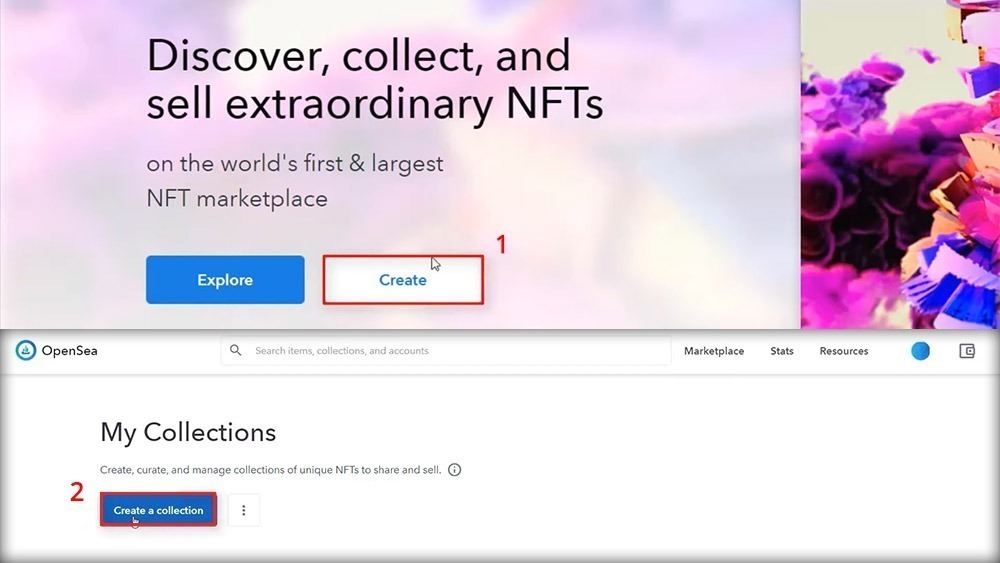
Now on the front page, I will click on Create. So this is the very front bottom we see. And then I have the option to create a Collection.
So for the purpose of the lecture, I will be creating a Collection that probably won’t have the purpose to really sell an NFT and make money out of it. So I’ll put the watermark logo that we use on our videos at Trading Academy and then I will be putting a name on my Collection. Let’s name it ‘Trading Academy‘. That’s what comes to my mind. This is the project I’ve been working on the last few years and then I have descriptions.
You should think about the Collection like your store and OpenSea says actually right here, provide a description of your store. I even didn’t see that but yes, the Collection is like a store. And you need to describe what are you selling in the store.
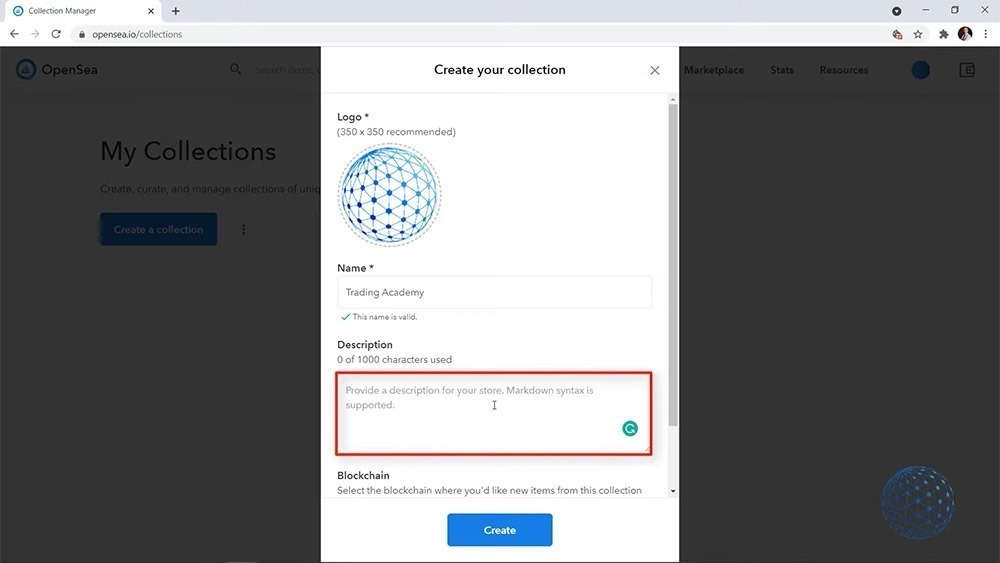
So for the purpose of the lecture one more time, I will just say ‘Items from Trading Academy‘, for example. Whatever you’re doing, you should put a decent description right over here.
Then you have the option to select the blockchain. You can stick to Ethereum, you have the Polygon, which is a fast gas-free blockchain experience that works with Ethereum. And then we have the Klaytn, which is a global blockchain platform. So Polygon is actually India-based if I’m not wrong, it came as a solution with the higher gas fees. So it’s up to you. It is with the MATIC crypto.
It’s a personal choice which blockchain you want to have but basically, the one you use, you will see that all new items from this collection will be added by default.
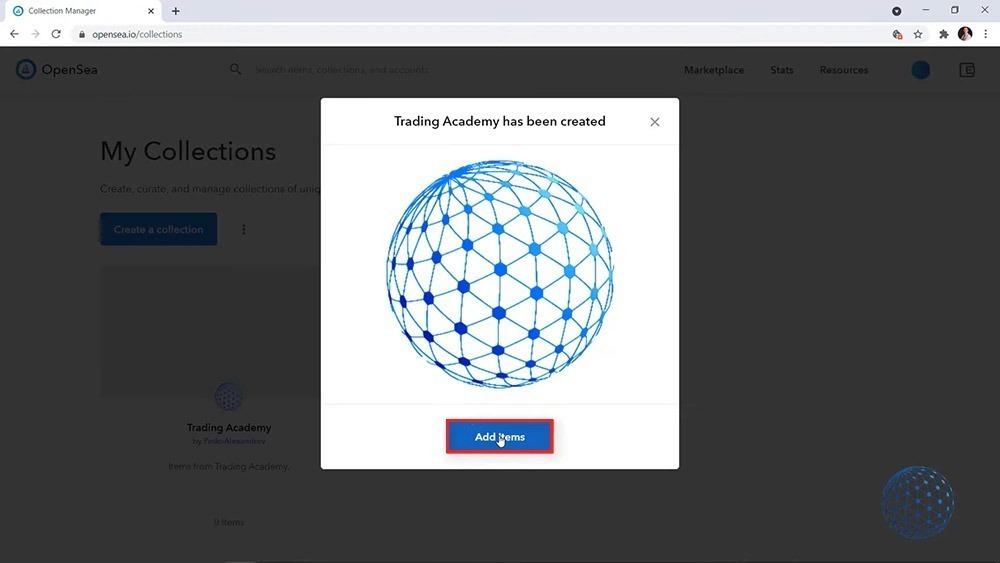
I will stick to Ethereum just for you to see what are the actual fees. And then I will click on Create and you see that our NFT Collection has been created and now I have the option to add items.
How to Create an NFT Art Item
So here is my store or collection where I have nothing at the current moment, but I have the option to add items. You can drag and drop over here simply anything. The maximum size is 40 megabytes, it could be an image, video, audio, 3D model. And below are all the file types that OpenSea supports.
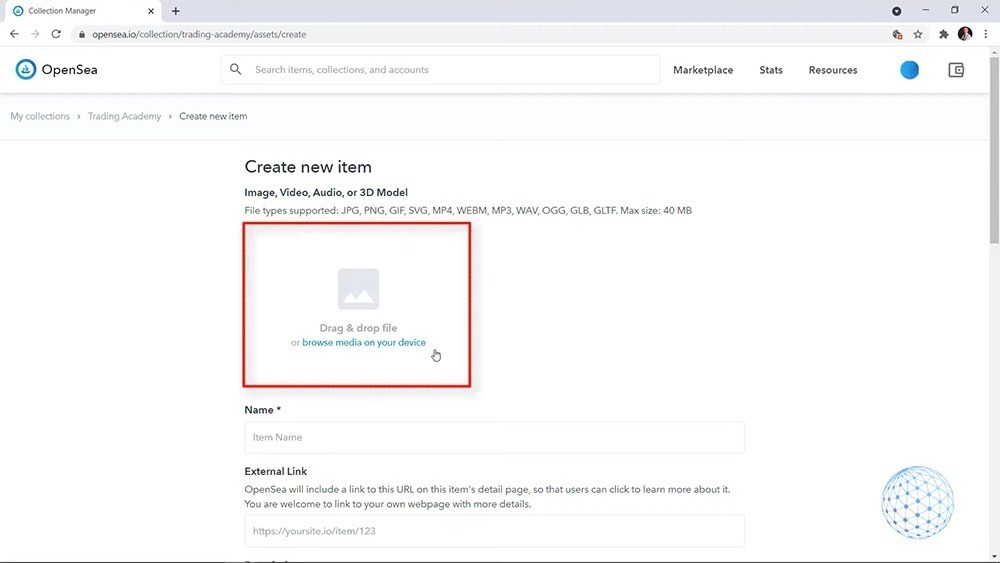
And as you know NFT is a huge world where you can sell really everything. So again I will put the watermark and then as a name I will put Trading Academy’s watermark. And this is our brand watermark so I don’t think I will be selling it, but this is what came to my mind.
Then you can put a link from the website. So what I can do actually is I will just copy-paste the URL from the Academy and put it right over there.
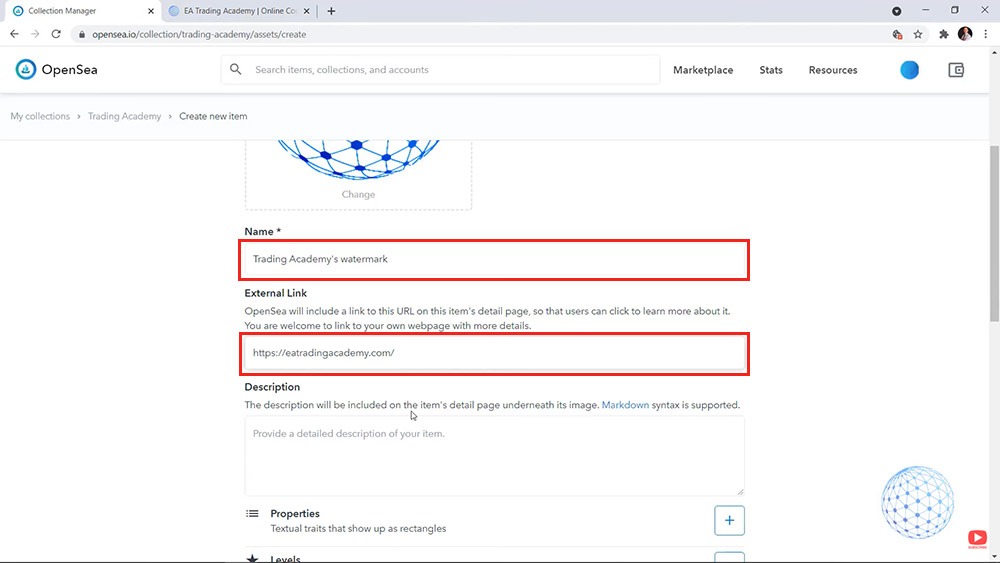
So if you have a website, it’s not a bad idea to drop the link so that people can see that you are actually serious about what you are doing. You have a website, let’s say you are doing some digital animated art or whatever. You should be having a website. If you want everyone to take it seriously.
And then we have the description that will be visible on the items details page. So here you should write a detailed description. Again, this is the watermark of the Academy.
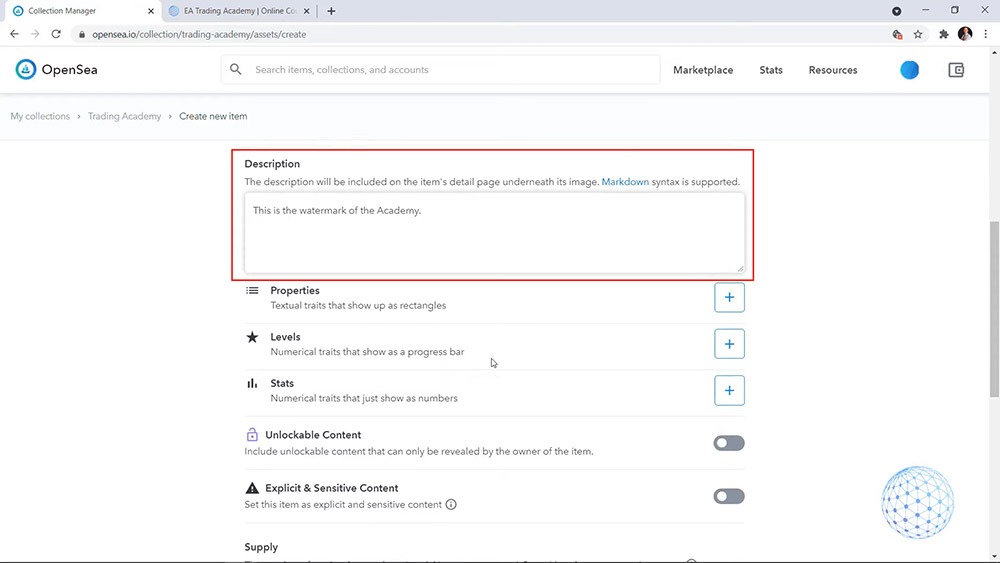
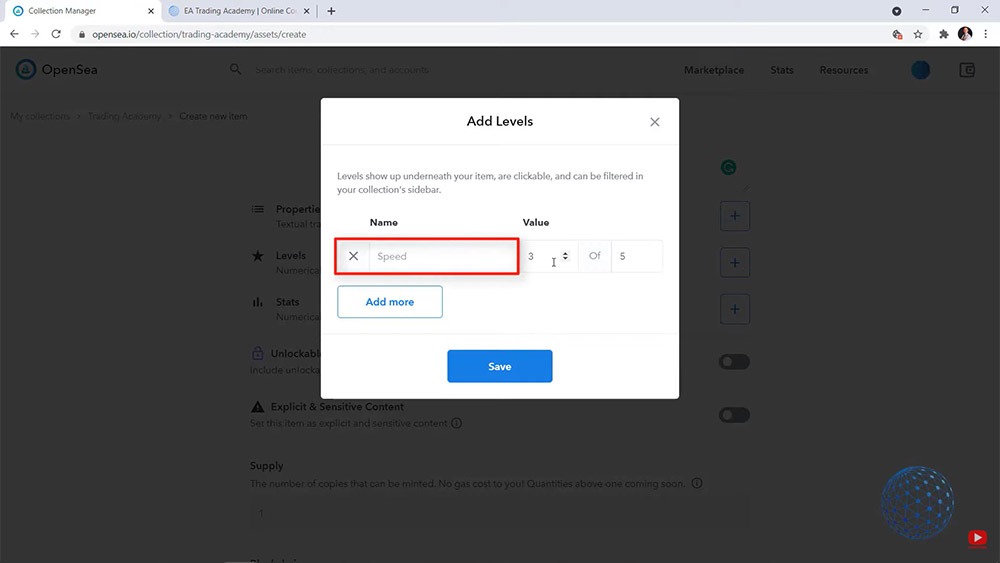
And then we have the Properties, so we have a few options here. It depends on what you are uploading as an item. But we have some Properties, we have some Levels. So it could be, for example, a Speed with a Value 1 of 5 if it is something connected with games, for example, this is where Levels are useful.
Then we have some Stats. For example, if I am uploading some pictures from the Academy and they have some different stats or videos that are more useful for the traders, I can add these stats.
And then we have Unlockable Content and with the Unlockable Content, it’s quite interesting because here I can add literally anything. It could be a URL or it could be a file that you want the buyer to be able to download. It could be an option for them to receive the actual item.
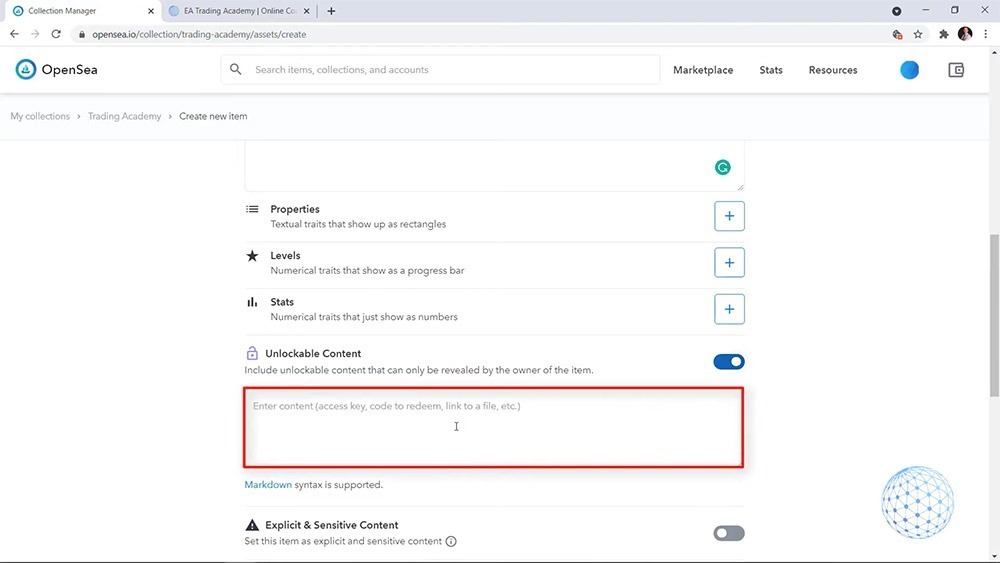
So if you are selling socks for example, and if you have NFTs with different stocks, you can give buyers the option and send them the actual socks, the physical socks. Or it could be a ball. It could be glass, whatever. You have the option here to put whatever you want for the buyer to make it valuable.
And for example, in my case, if one day we turn this Trading Academy Collection into a real store and we do NFTs (I haven’t planned it, honestly, but why not) what we can add here, for example, is links to some free courses. Or we can give them coupons or we can give them access to some of our paid courses. So whoever buys the NFT can access some of our paid courses. So it really depends on what your business is all about. For the moment, I will disable it.
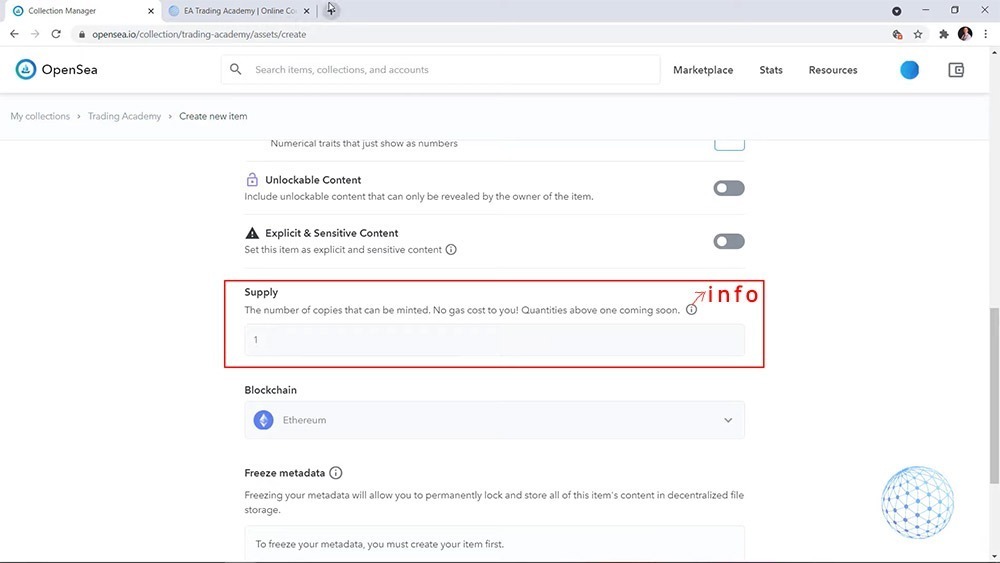
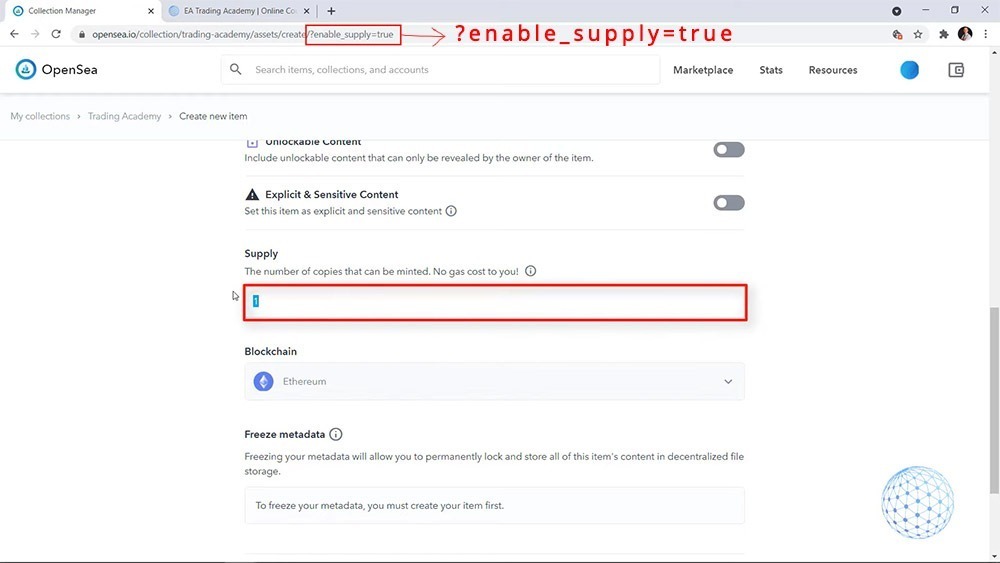
And then we have the Supply. This is the number of copies that are available for minting. And what does this mean? I will actually click on the Info tab and there is the explanation exactly.
So what is minting? This is the fee when you are transferring from one account to the other or when someone buys an item from you.
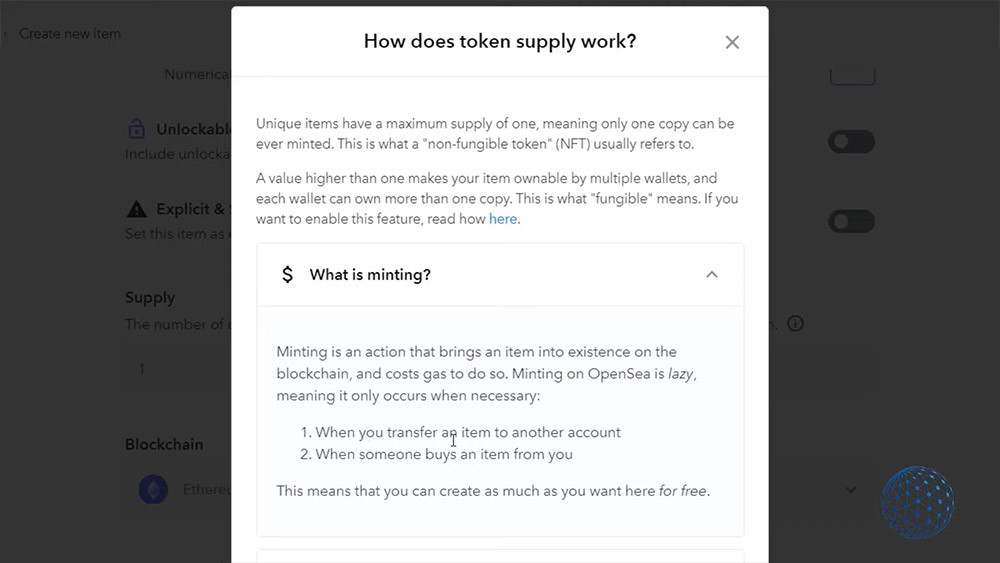
In all other cases, you don’t pay fees. So when there is an action, then basically this is the mint process and there is a gas, but there is no gas if you want to create more copies. But you see by default that the Supply value is 1 and the field is not active.
How to Enable NFT Supply
So I’ll show you a small trick on how you can enable it, I will go to the URL. Now let me try to write it precisely. It was ?enable_supply=true. So now you can see that the number of copies that can be minted is editable. I can select 50, I can select 100 as many as I want.
But here, something important.
Don’t forget that the NFTs are Non-Fungible Tokens and if you want to create a valuable one, I would suggest sticking to 1.
And it isn’t active for a reason. I just gave you the trick on how you can enable it. You just need to drop this line at the URL.
Now because I changed the URL, I will need to quickly import again the NFT that I want to create. I will keep the Supply to 1 because I personally believe that NFTs that are super unique have more value.
Then there is the Ethereum blockchain, which I have selected. And on the bottom, we see that we have the option to Freeze metadata.
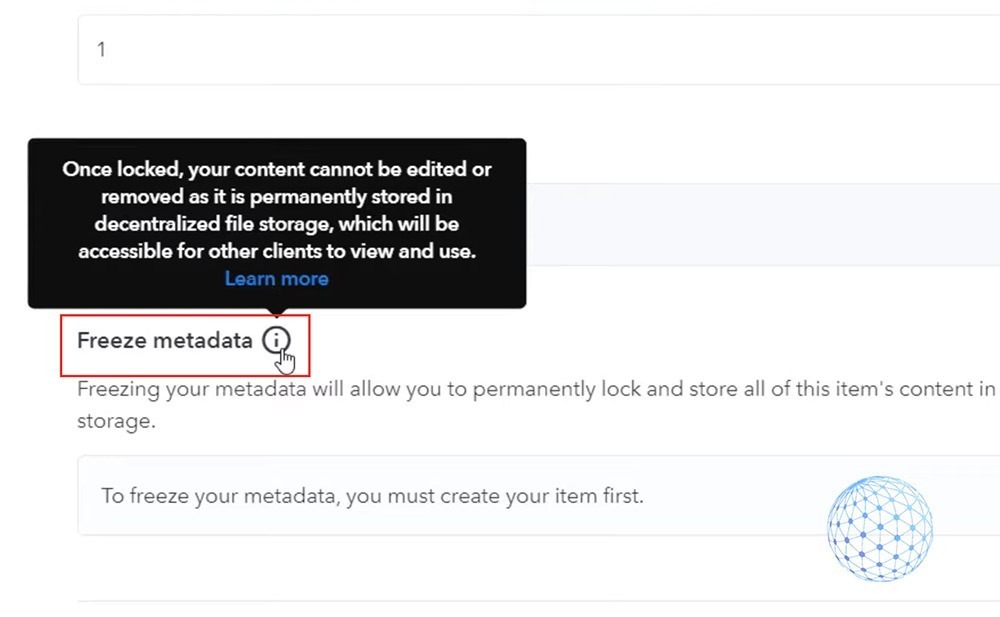
And it says that ‘Once locked, your content cannot be edited or removed as it’s permanently stored in decentralized file storage, which will be accessible for other clients to view and use‘.
And below you can see that to freeze your metadata, you must create your item first. So I will tap on Create.
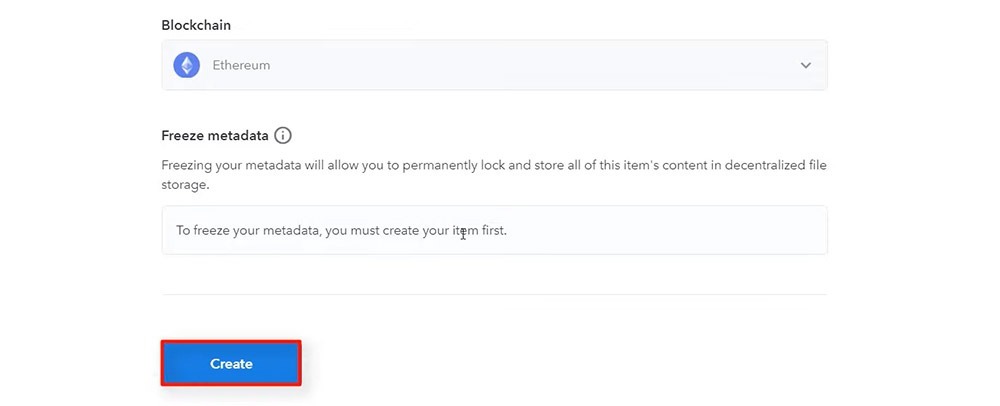
And Trading Academy’s watermark NFT has been created.
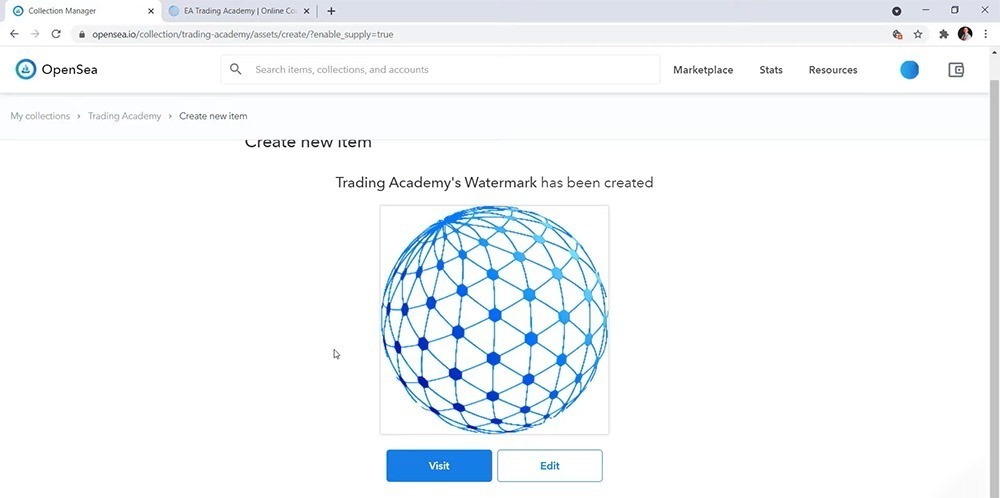
And then I will just visit it. This is the NFT art of the Academy. I don’t have any trading data yet. It has not been traded. It’s listed by me.
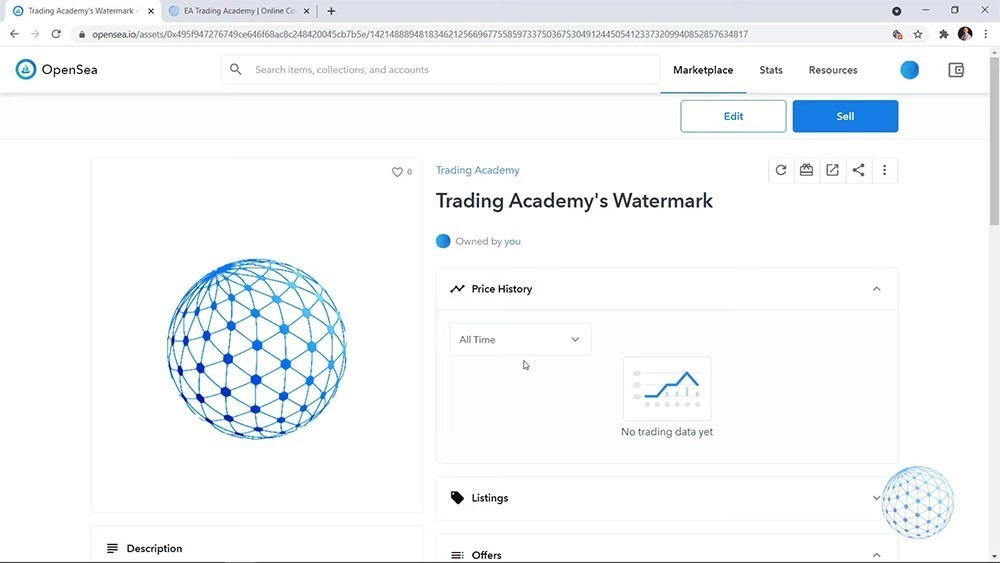
And of course, if you want to make an attractive store collection, the more details you put, the better.
Below are the Contract Address, Token ID, it’s under Ethereum Blockchain, and Trading History. We have just one event that was created by me a minute to go.
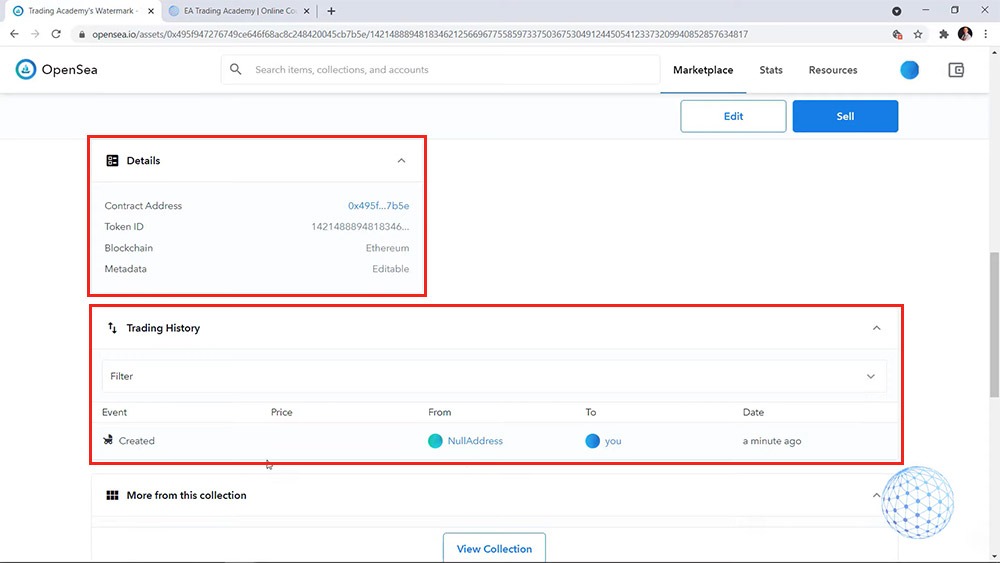
So it is that simple to create an NFT and of course, you should spend some more time for descriptions, making it a little bit more attractive and trustworthy.
However, the purpose of this lecture was just to show you the steps of how you can create an NFT art. And something very important is this NFT is not yet on the blockchain. It will be there once I sell it.
This is when the gas fees will play the role to actually store this NFT on the blockchain. But for the moment it is just listed in my Collection.
How to Sell an NFT Art
Now, you will see how you can sell your NFT because there are many details during the process. But no worries, it’s nothing complicated.
Now I will show you how you can sell your NFT once you list it on the OpenSea. And as I said, it’s nothing really complicated. All you need to do is click on the Sell button above the NFT you have already created.
And here are the settings and I will try to explain them with simple words.
Fixed Price
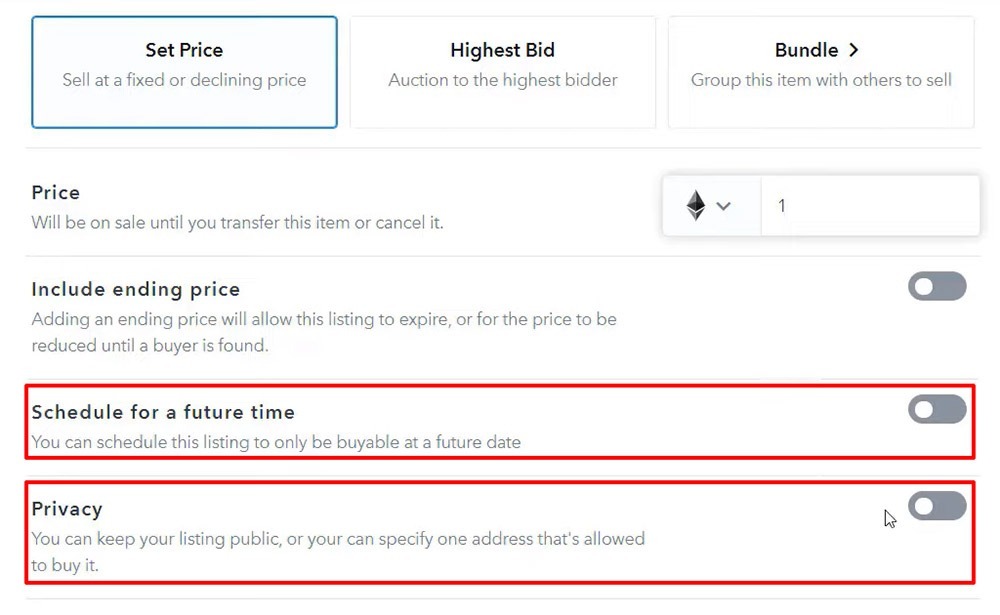
So the first thing is you can sell the NFT at a fixed price. For example, I can decide that this NFT worths 1 Ethereum and this will be the price that I will be requesting for the NFT. And immediately I want you to see the Fees.
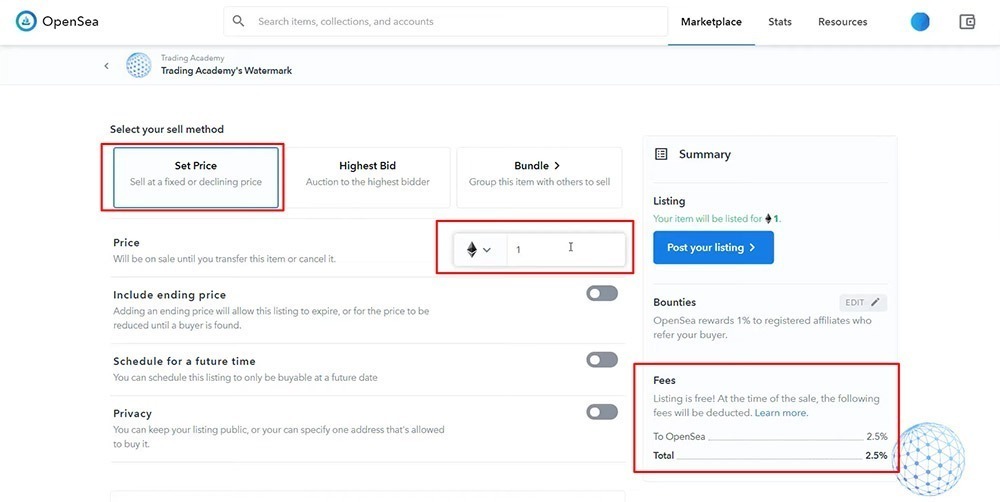
OpenSea charges 2.5% for using their platform. So it depends on how much you’re selling the NFT art. You will pay the fee accordingly.
Using Auction
The other option is to use an Auction. And here, of course, it’s all about the Highest Bid so you can choose a minimum bid price.
For example, you can start from 0.1 of Ethereum. And then we have the Reserve price, which is pretty cool because you can create a hidden limit by setting a reserve price. As soon as the price reaches, for example, 2 ETH, your item will be auctioned. The highest bidder will win it. And it is for a certain period of time.
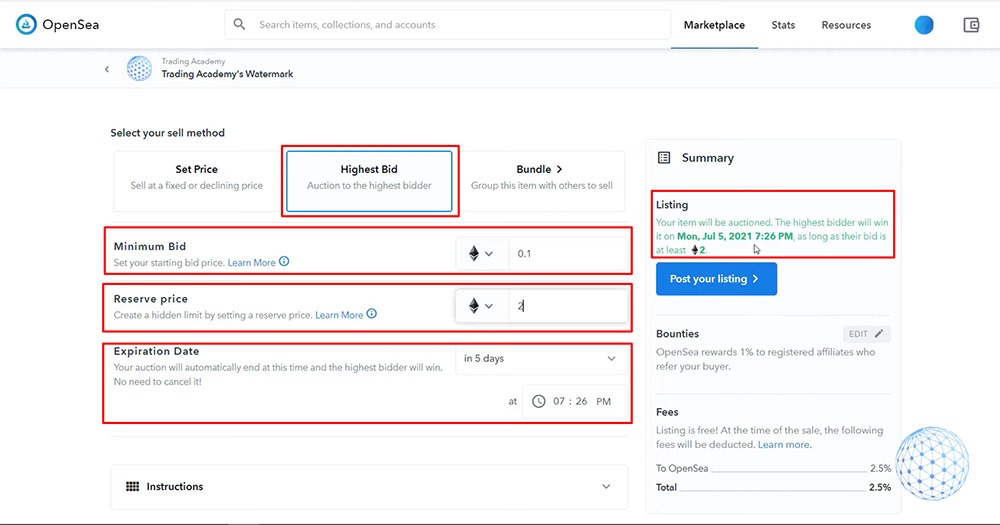
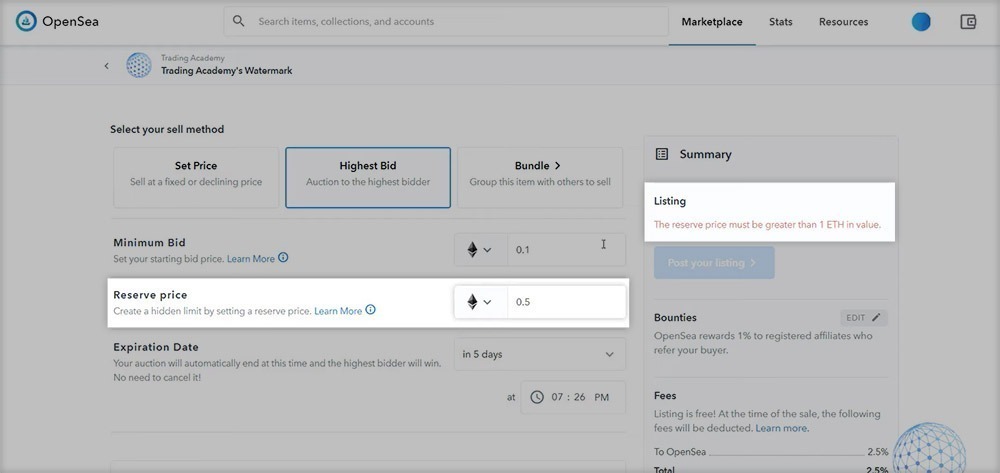
Something important here, you cannot put a reserve price below 1 Ethereum. For example, let me put it to 0.5. You will see on the right side in red, I have the reserve price must be greater than the 1 Ethereum in value.
You can sell your NFT art in two, five, ten days, whatever Expiration date you want. If you are not in a rush, I would suggest to you to give it more time, because this way you will be having hopefully more bids. So you can go for a week, a month, or you can select never. Meaning that you won’t have an expiration date for the auction.
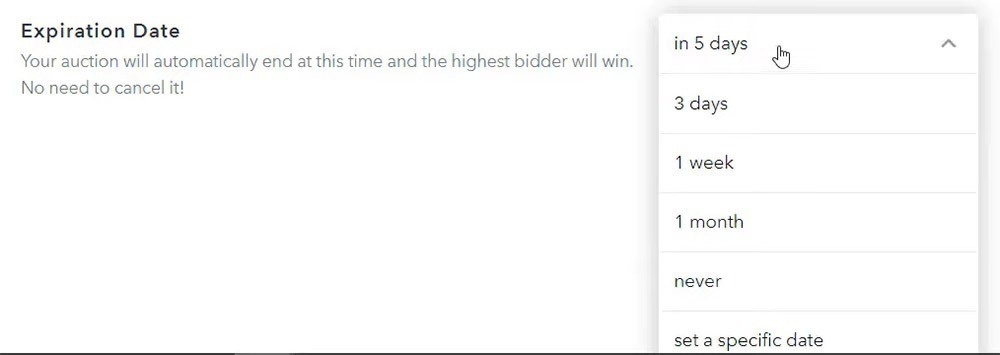
I personally believe that if you have a limit date, you’re kind of giving the people a limit to thinking about it, to decide if they want to bid or not. So I think something about 1 week is really enough, an appropriate time for the expiration date.
How to sell a group of NFT art items
On the right side, we have the Bundle. So if you have a group of NFT items, you can bundle them and sell them together.
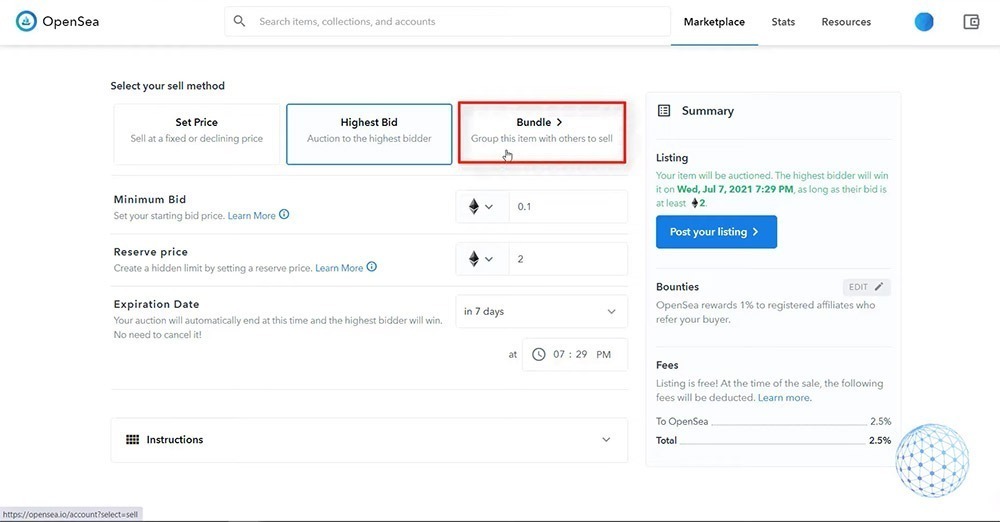
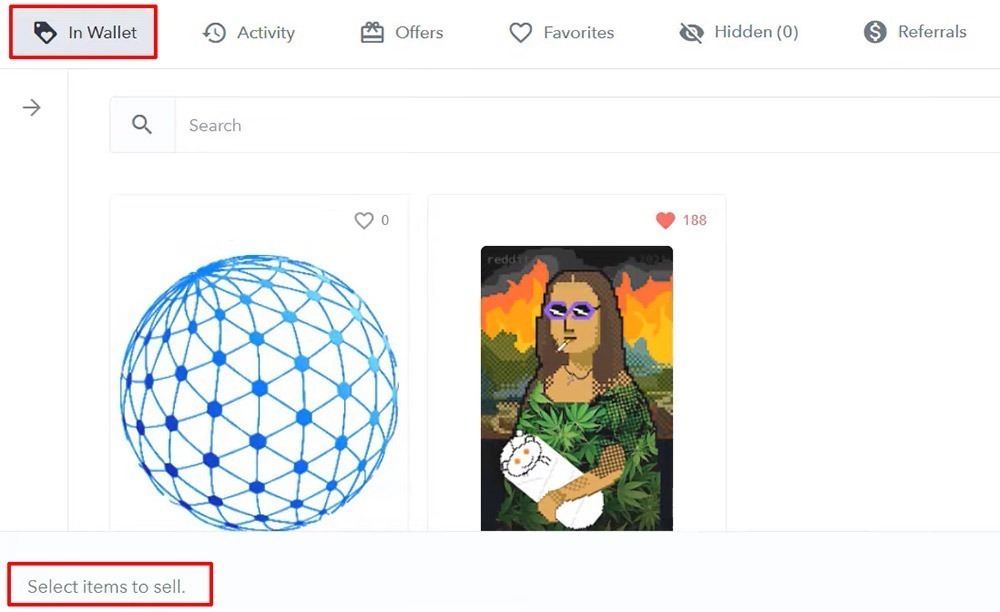
I will tap on that, but I don’t have a bundle. In my Wallet, I have just the NFT that I have bought previously and the watermark NFT that I have created before. I don’t think they bundle well at all.
So one more time you can select between Set Prices and the Highest bid. I want to make the lecture really educational and show it step by step how to buy and sell an NFT art so I will go for a Set price. Let’s go for 1 Ethereum, for example, a fixed price for the watermark of the Academy. And if you are on the Set price, actually you can schedule for a future time or you can keep it private.
And then on Instructions, there is something very important. If you have just created your OpenSea account, just like the one I have created for the purpose of this lecture, you have to complete two free plus gas transactions.
So the first one is to initialize the account or it will become eligible for selling items. And the second one is to allow OpenSea to access the items.
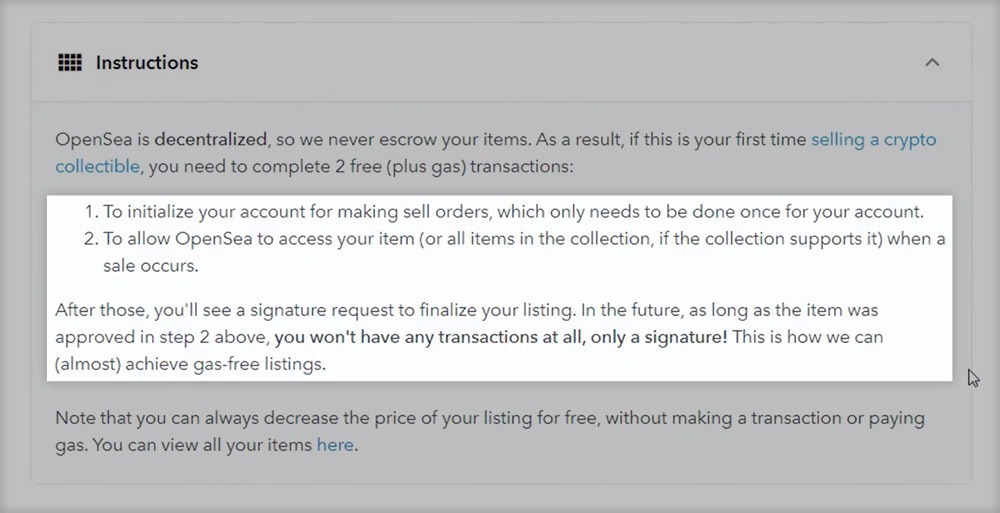
And what it says after that is important.
After those, you will see a signature request to finalize your listing. In the future as long as the item was approved in step two above, you won’t have any transactions at all, only a signature.
OK, so these two should be made just once and I will show you that right away.
Posting the NFT listing for sale
So I’ll click on Post Your Listing and it says, to allow OpenSea to sell items on your account, you must first complete a free plus gas transaction. Keep this stuff open while we wait for the blockchain to confirm your action.
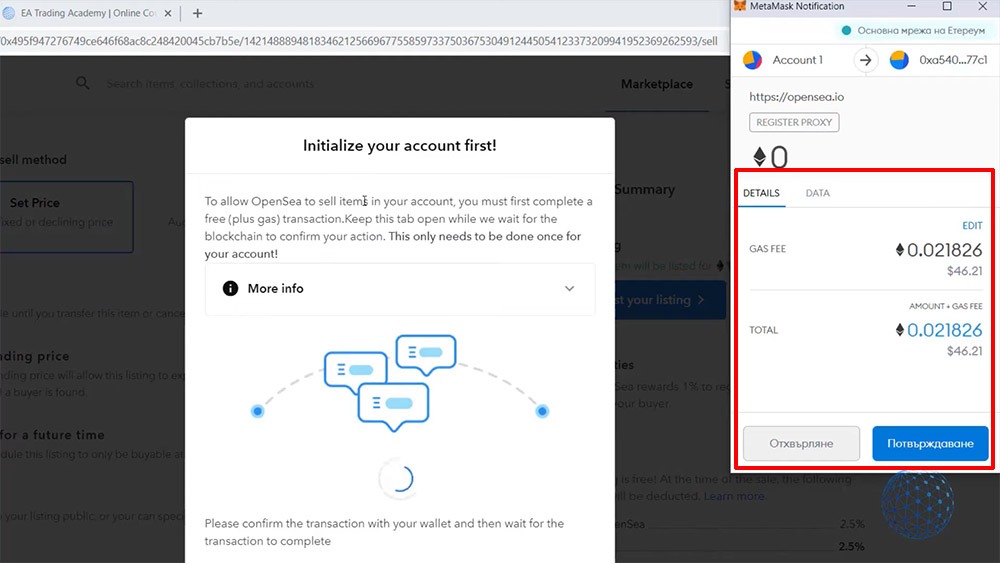
And on the right side, you can see that the Gas fee that I should be paying is 0.021826 Ethereum, which is approximately $46.21. And I need to confirm it.
I have added some more Ethereum before preparing this lecture so I can actually do the whole selling process. And I will just click on Confirm, and if I click on Edit, you will see that I can actually do it cheaper if I want to do it slowly. But I think it could take even a few days that we have the average speed.
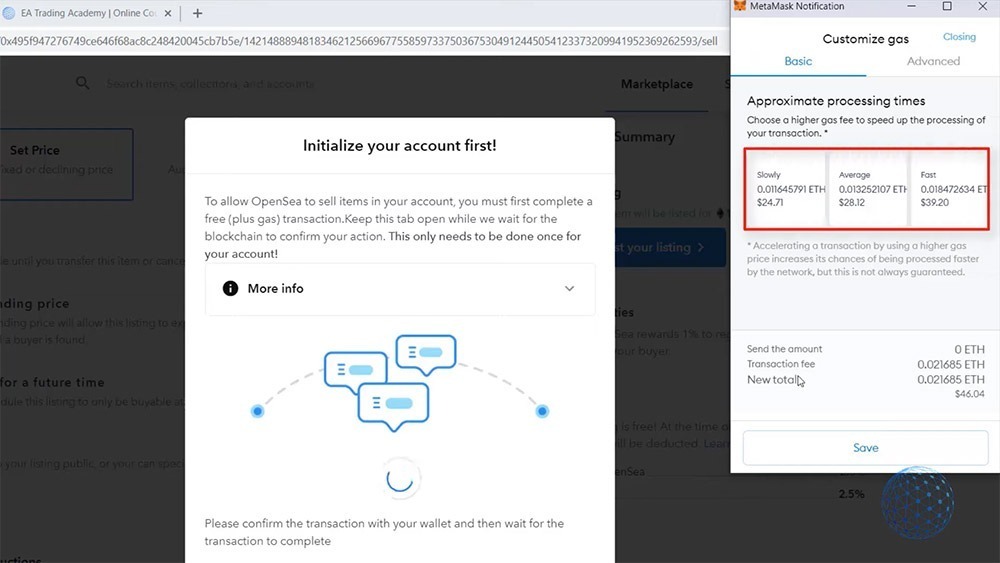
So slowly is about $25. Then we have the average speed and a fast. However, I have confirmed that because I want to do it while I’m recording the lecture. Obviously, I don’t want to wait hours or even days.
But what’s interesting is that you can choose a high gas fee to speed up the processing of the transaction. So you have the option actually to choose how fast you want to do it. If you are not in a rush, you can choose the slow option and pay less.
But one more time. I wanted to do it while I’m recording the lecture so you will see how it works. And it’s interesting to see actually how long time it will take us for the selling account initialization, even if we go with the fastest option.
Selling account initialization
It took actually less than a minute, I think.
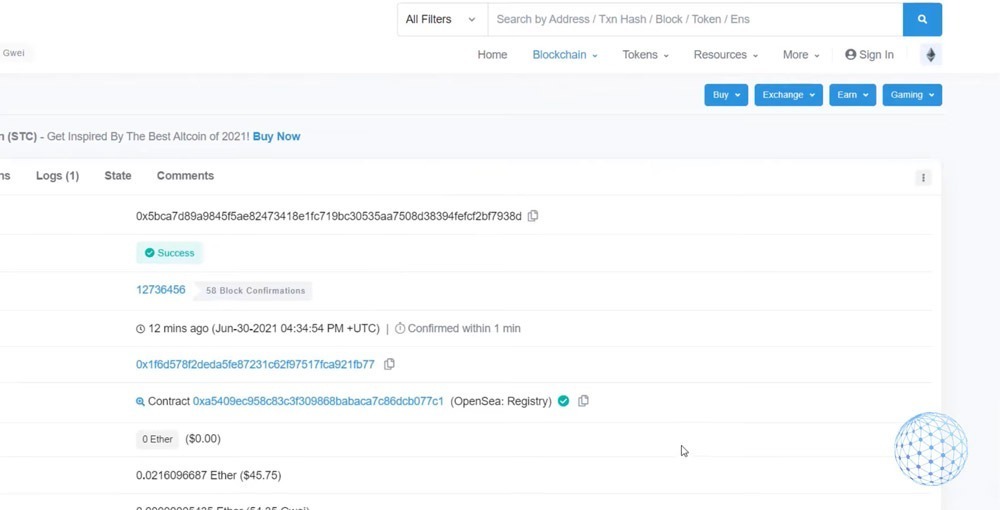
So once again, this was a one-time payment to initialize the account for making selling orders.
And now let me put again 1 Ethereum for the price and I will post the listing. And now you see that I need just to sign it. So I’ll click on Sign.
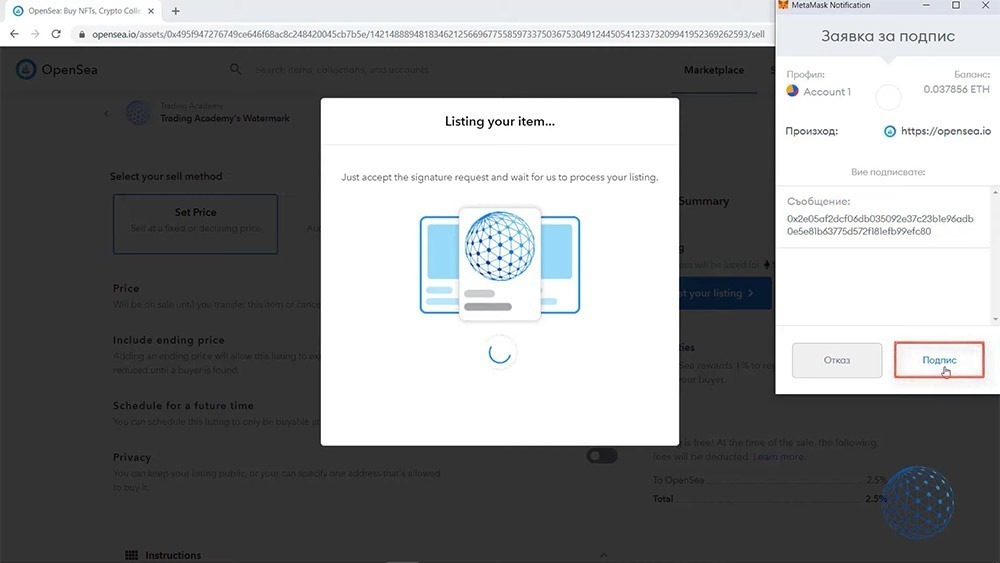
And so what happens? The NFT art item that we have created at the beginning of this lecture is listed for sale. So Trading Academy’s Watermark is listed for 1 Ethereum.
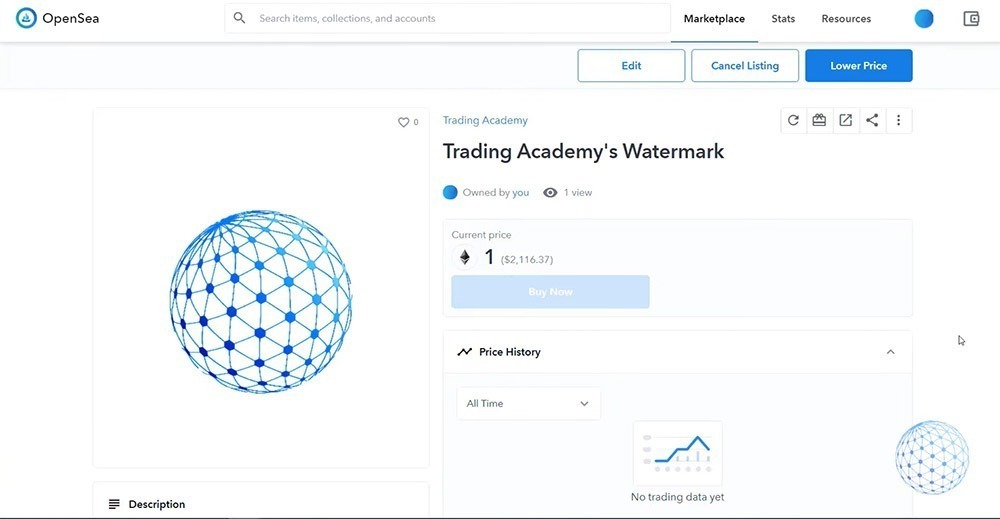
Honestly, I was not planning to list our watermark, but for the purpose of this lecture, I decided to do it. So you will see step by step how it works. And below in the trading history, you will see that our NFT item was listed for 1 Ethereum.
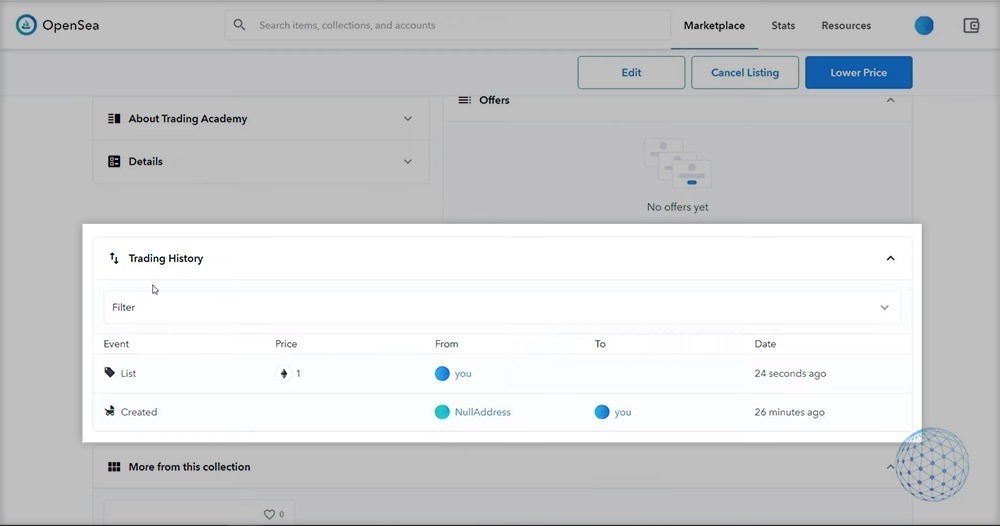
Why I was not planning to sell it as NFT art is because we paid much more for a designer to create the watermark, honestly.
But any tutorials I record should be 100% complete because you as a person that spends time watching my lectures, deserve to see the whole thing.
So now if I look on OpenSea for Trading Academy, let’s see if we will see it listed. Oh, yeah, it’s listed on the Trading Academy.
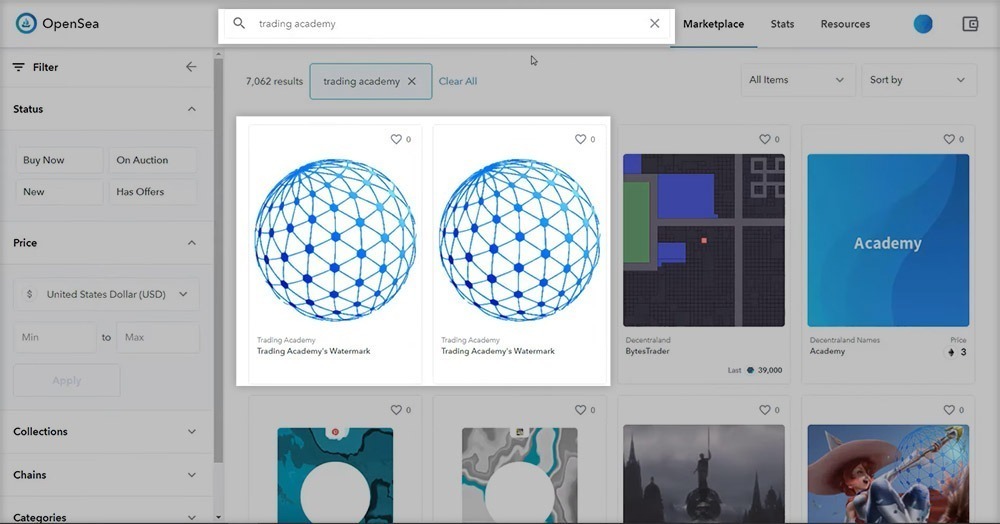
But one more time, that was not the purpose of creating this NFT. I just wanted to show you the whole process of how to create and sell NFT art. And as simple as that, you just need to follow along with the steps one more time.
Keep in mind that you are paying this fee above $40. And as you saw, it could be less if you are not in a rush. I’m not in a rush. Just wanted to make it quick while I’m recording the lecture.
But the fees, when the sale happens, actually will be covered by the buyer.
When you use a fixed price, like what I did right now for the watermark NFT, if someone buys this NFT, they will be covering the gas fee for the transaction. But if I was using an Auction and I see the offerings, if I accept a certain offer, let’s say someone offers me 5 Ethereum and I’m happy with that and I accept the offer, then I’ll be taking care of the fees.
OK, this is very important to note. So it’s up to you what is your strategy. Think about it depends again on what you’re selling.
It’s all about actually what you are selling so you can build your strategy. If you have any questions on how to create and sell NFT art, let me know in the comments below. I’ll be super happy to assist you and I will see you guys in the next lecture.

![How to Create, List and Sell NFTs on Opensea [PROs and CONs]](https://eatradingacademy.com/wp-content/uploads/2021/09/how-to-create-list-and-sell-nft-1024x576.jpg)
