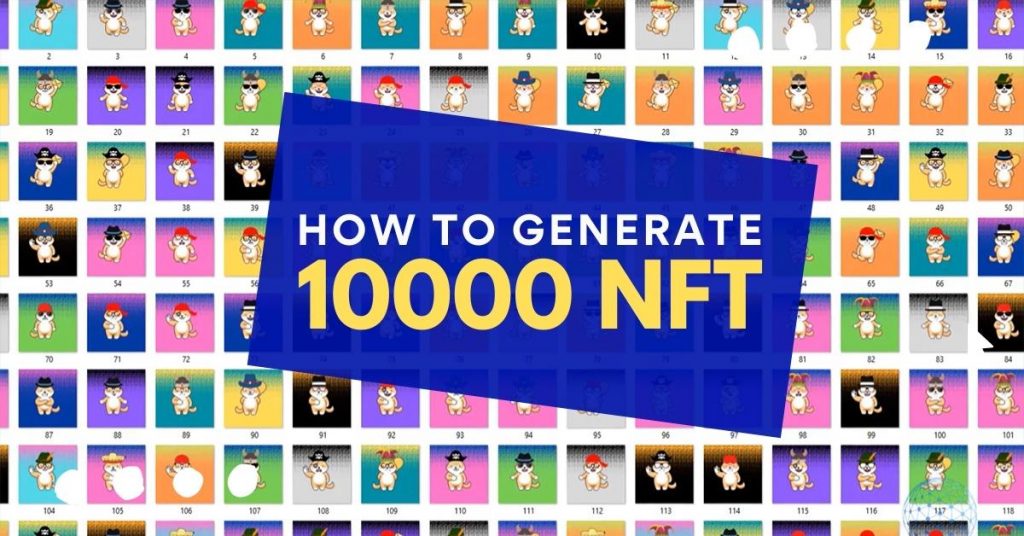
Probably many of you already have seen those 10000 NFT collections on OpenSea on any other platform and you wonder how the hell these guys have designed or generated 10000 unique NFT items. Well, actually it’s not that complicated because it is automated generation.
Now if you’re brand new to the NFTs you should know that this is unique digital art. We can say it’s just a JPEG over the internet that is sold as a token. It’s on the Blockchain and it has a collectible value. So if you are a fan of any artist or any piece of art over the internet you will see that most probably this is an NFT and you should pay some Ethereum or with some platforms, we can pay straight away with our cards.
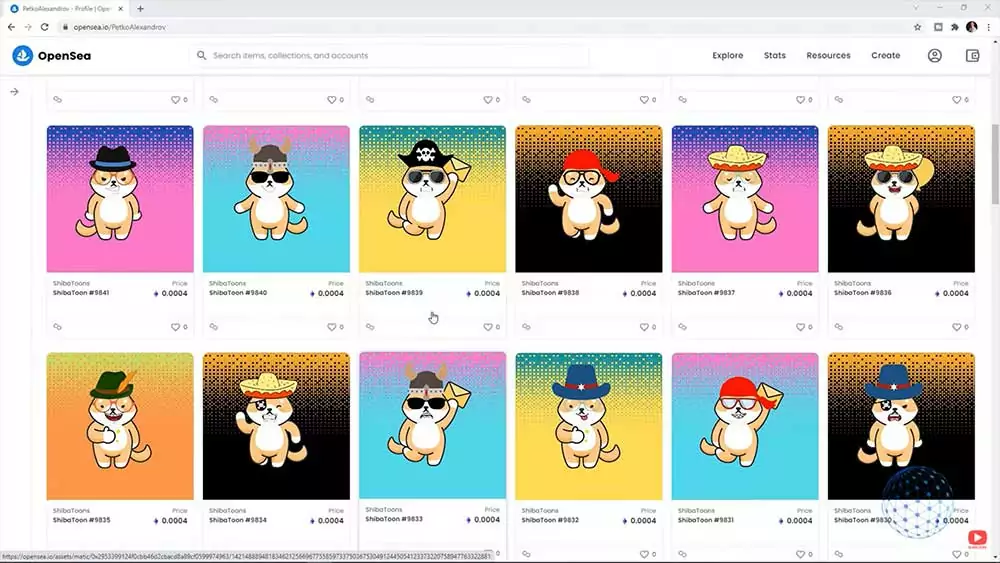
However in this lecture, I will focus on generating unique 10000 NFTs and in one of the previous lectures, I have explained in detail how I made 10000 NFTs that are already on OpenSea for educational purposes and demonstrational purposes. If you want to buy any of those NFTs to support my work I’ll be super happy to see that. Who knows, one day if my channel is huge those NFTs could be really valuable.
How to generate unique 10000 NFT arts
So now I will show you without programming how you can generate unique 10000 NFTs and in the previous lecture, I have shown how I designed those 10000 NFTs. I have explained that this is by creating different and unique layers such as the background, the body, the hat, the glasses, and the mouth. It is super easy by the way with any program. Some use My Paint, others that are more familiar with Photoshop go into details or some are painting them by hand. I used Canva because I feel super comfortable using this software usually for my YouTube thumbnails.
However, I have the ready unique layers and now I will show you how to generate and create those 10000 NFTs fully automatically with ready-to-use code, so if you’re ready I am let’s do it.
Requirements to generate the 10000 NFTs
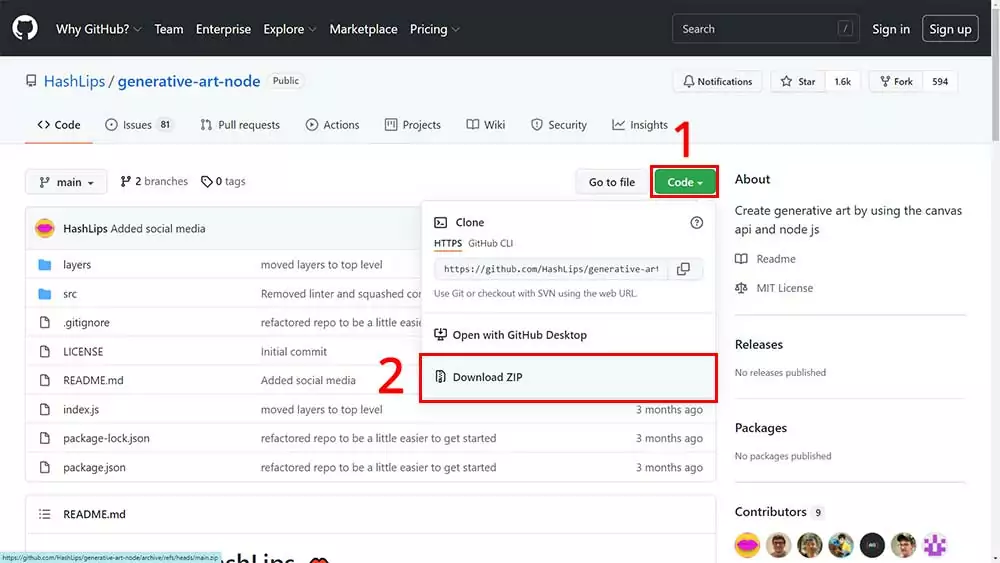
Now I will show you how to download the ready-to-use code so you can generate the 10000 images for your NFT collection. Follow this link to the HashLips repository on GitHub from where you can download the code. Once you click on the link go to the Code button, and select Download ZIP.
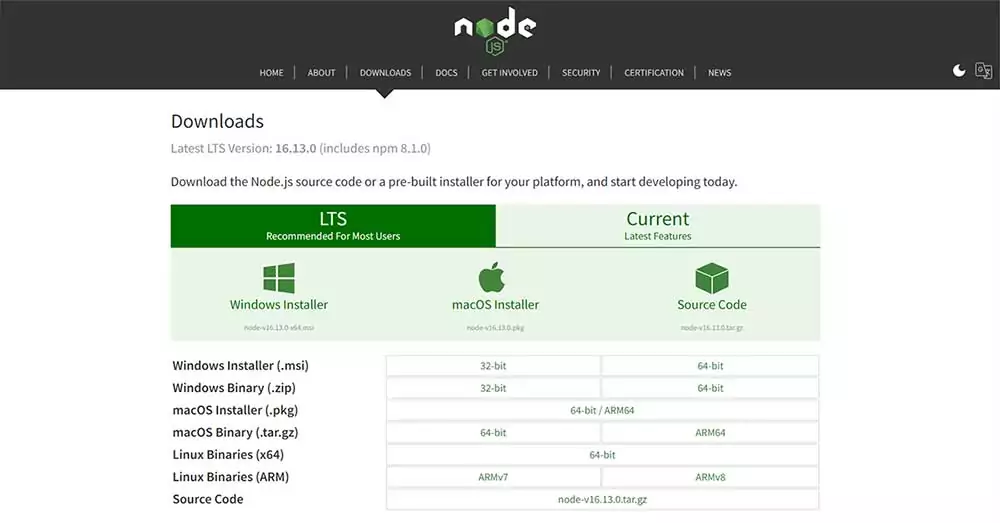
To start the project you need to have Node.js installed on your computer. If you don’t have it, you can simply Google it and download it. Select the right installation file depending on the type of device you have. I’m using Windows so I will click on Windows Installer. Once it is downloaded there are a few easy steps to follow to install the software.
The NFT generation code
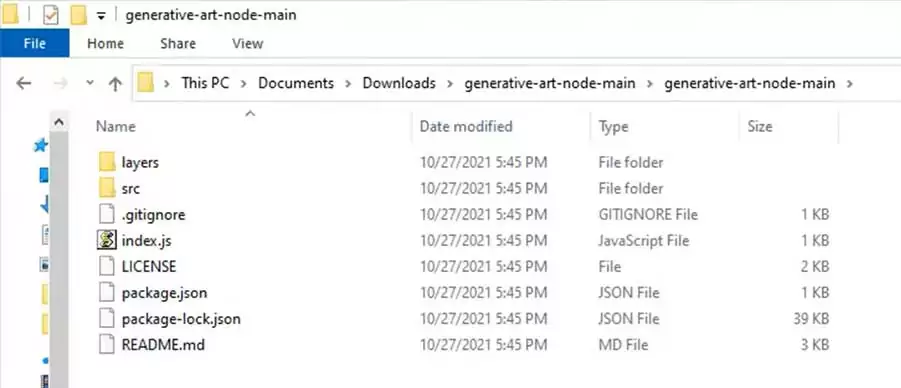
So now we have Node.js installed, I will try to run the project. First, I need to extract it or unzip it. It will take a second so these are all the files that the project has. In the ‘layers’ folder, we will drop all the layers that we have already created and in the ‘src’ folder you will find the source files with the logic for generating the NFTs.
You can open those with any text editor that you have, for example, I’ll be using Notepad++ but you can use really any editor that comes to your mind. In the first lecture of this kind, I said that you need the Visual Studio Code but then I figured out that you can edit the generation code with any text editor.
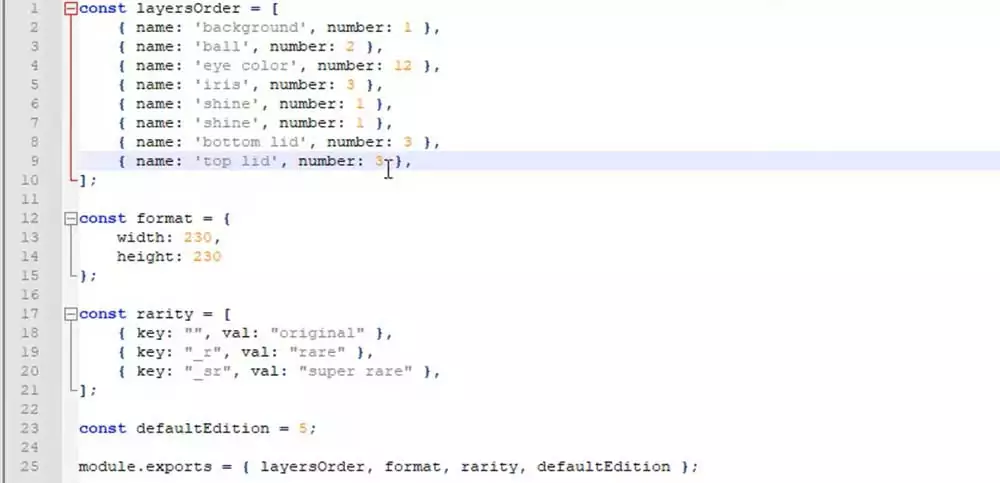
So I will just open it and in the config.js I will be adding the layers but with an exact latersOrder sequence. Here we can choose the format that we want for each NFT then we have the rarity if we will be using any values and as well we have the defaultEdition which is the total number of NFTs that will be generated.
The next folder is the main.js where is the logic of the project. There we have the build folder or this is the directory for the generated NFTs, and there is the logic for duplication or in other words in the file there is a code that is responsible for preventing the generation of images with the very same layers. Actually, if you see a log in the console with this text, it means that such a duplicated image was found and it will be skipped and a new image will be generated with a different combination of layers.
Then we have the index.js which is the entry point of the application and inside we put together all the functions that I already described and by starting this index.js we are actually running the application.
Preparing the NFT layers
Alright, so now I will add the layers that I created and I will start the NFT generation application. I’ll go to the folder where I have the actual layers and I will paste them in this folder called ‘layers’. I’ll just copy-paste them.
We have some folders inside that I won’t need so I’ll just delete them. I will change the view so I can see exactly the layers and I will create a new folder called ‘background’ and inside I will drop all the layers with the background. Then I will change the names of these layers to be consecutive numbers starting from 1.

Now I’ll go back and I will create a new folder. This will be the folder for the body or the Shiba Inu puppy and I will just select all the body layers. I will again cut them and I will paste them into the folder. I will just change the names, so the first one will be 1, the second one will be 2, and so on until the last one.
Then I will go back and create a new folder that will be for the glasses for example. So I’ll just name it glasses, here it is and I will select all glasses layers, I will cut them and I will drop them in the folder.
I guess you already understand what I’m doing, I’m just placing all the layers in the appropriate folders and as well I’m changing the names to be consecutive numbers which will be easier after that for our work. So I have two more folders to create, one for the hat and the other one for the mouth. I’m sure you got the point so let me do that super quickly and when you do it one time you will see that it is really nothing complicated and once I have the 5 folders, I will go back to the folder ‘src’.
Setting up the project configuration
So now I will right-click on config.js. I will open it with Notepad ++ and here I will need to check how many layers I have for the background. So I’ll go to the background layers folder where I have 10. So I will enter 10 and continue with the next layer folder.
In our case it is Shiba-Inu, this is how I called the folder itself so I will write it down Shiba-Inu and I will go back to see how many layers are inside, and then I will enter the glasses and as well a number. Then we have the hat or this is the layer called hat this is the name of the folder. Inside I have 10 different hat layers. I will put it as a number 10 and then I will have the mouth which is our 5th layer and inside I have actually 11 layers. So this is what you need to do.
By the way, you can have as many layers as you wish. If you want to add one just copy-paste it on the next line and change the name and the number. Below we have the format now I will select the maximum for the moment which is 3000×3000, so I will have a good quality for the NFTs. As well we have the final number, in this case, I want to have 10000 NFTs generated and just above the defaultEdition we have the rarity which obviously is very important when it comes to NFTs.
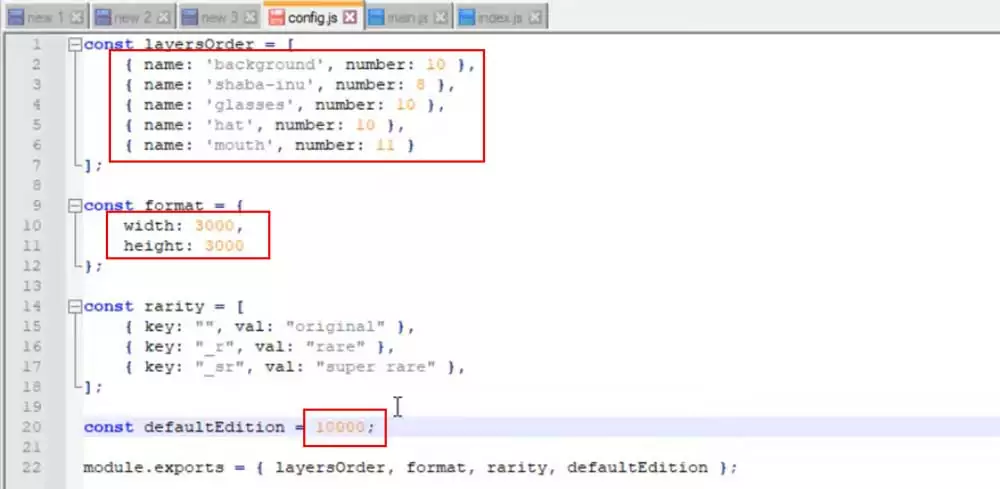
So you can select here if you want your NFTs to be not that rare, you can leave it to original or you won’t be leaving anything after the name of the NFT if you want it to be rare you need to add _r and if you want to have it like super rare it is _sr. So for example,
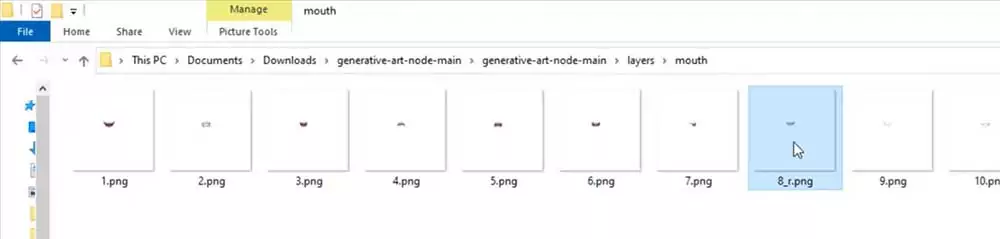
if I want to have the mouth to be super rare I will just name it 11_sr and if I want to have any of the layers to be rare I will just rename it, for example, 8_r.
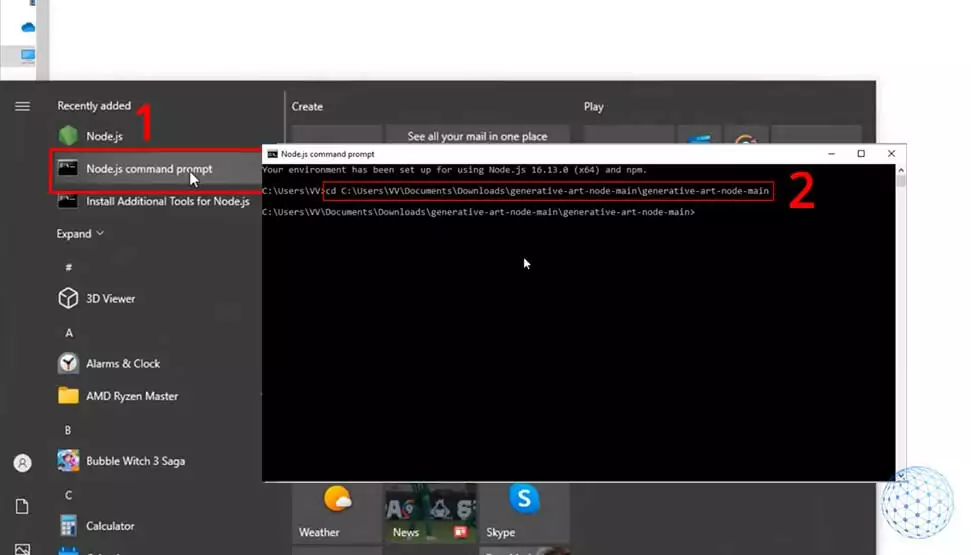
Now we need to start the application from the Node.js command prompt that we installed earlier. Once it opens we need to paste the path to the directory where we have the index.js. I will copy it and then I will write ‘cd’ space and Control+V just hit on enter and now we are in the directory where we have the index.js.
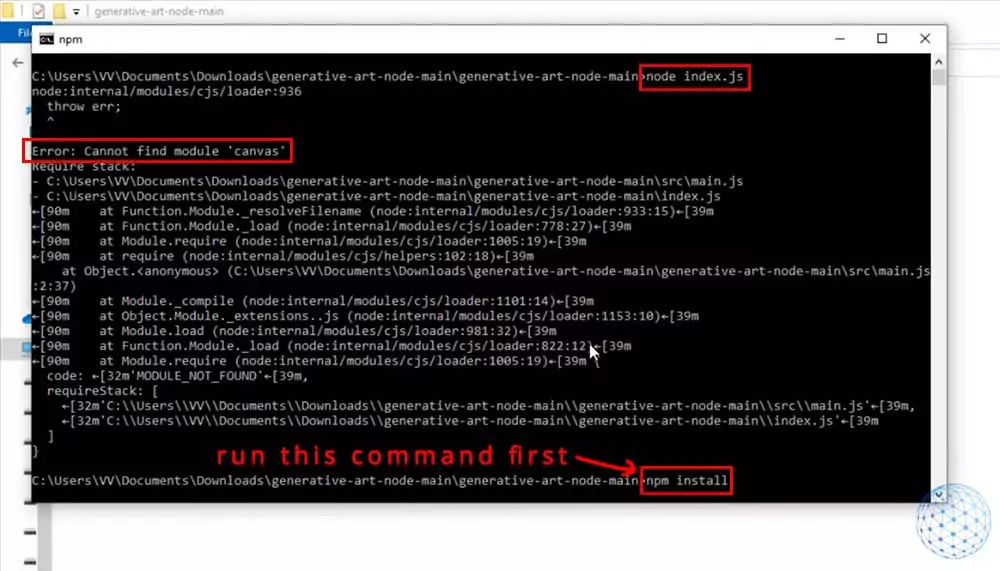
Now I will need to type ‘node index.js’ and I have an error. So what did I miss? First, we need to write ‘npm install’ and hit on enter. So now we will install all the libraries in the package.json file and you can check what’s inside if you want but actually the most important is the one at the end, Canvas 2.8.0, which is the function for putting the layers one over another.
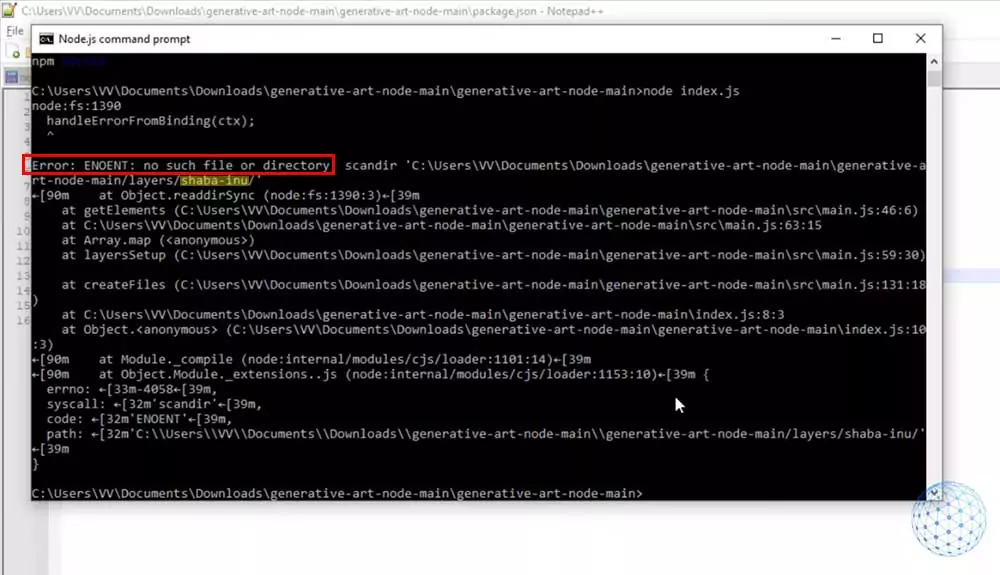
So we have the npm installation already and now I’ll just write ‘node index.js’, I will hit on enter and I have an error again. Let’s see what I have missed this time. It says right over here that I have an error in the Shaba-Ino layer’s name. So I’ll just go to the layers and there I have written Shina. It should be Shiba. Then in the config file, I will change to Shiba Inu. I am showing those errors in case it happens to you so you know what to do.
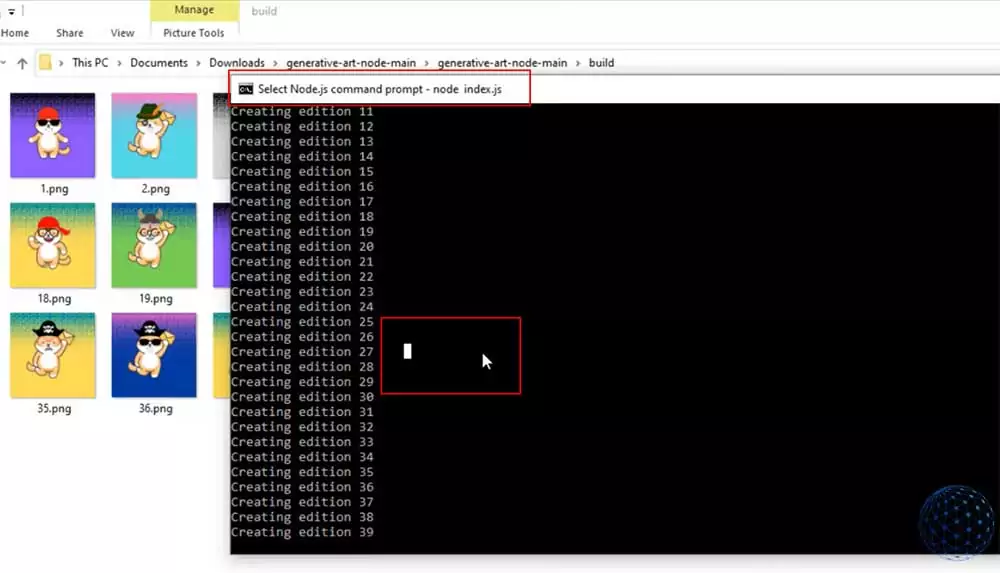
Then I will write ‘node index.js’ and this will start the creation of the NFT. Now I will go back to the folder called ‘build’ and in real-time you can see how the NFTs are being generated.

So first comes the background, then the body then comes the glasses, the hat, and the mouth and this will repeat again and again until the 10000 NFT are generated and they all will be different. They all will be unique which means that some of them will have similar or same backgrounds like what you see with 6 and 8 or with 7 and 9. Or you will notice some with the same body or hat or glasses but they all will be unique.
They will be generated automatically and obviously, it will take some time, you can see the speed in the command prompt, and actually, if you want to pause it at any moment for any reason all you need to do is to click with your mouse over the command prompt anywhere so this will select something in the command prompt and you can see it says ‘Select Node.js command prompt’ or you just selected something and it paused.
If you want to continue, hit on escape button on your keyboard and it will continue the NFT generation process.
So it is this simple to generate the 10000 NFTs. It’s another story uploading them on OpenSea but I will leave that for the next lecture where I will show you a super unique method of uploading 10000 NFTs on OpenSea. If you have searched that over YouTube you will see the method where we are recording the movement of the mouse, I really didn’t like that method. Even I have mentioned it as a solution in one of my previous lectures when I watched my lecture after that I said no way.
So I asked one of my best friends who is a great developer to find a solution. I don’t know what he did but he found the solution and in the next lecture, I will show you how that works. Thank you guys for reading and I will see you soon.