Uploading an NFT to OpenSea or any other NFT marketplace is easy. A few simple steps and your NFT is out there ready waiting for the people to buy it. But what if you actually create 10000 NFTs, it will take you some time to upload it on OpenSea?
Probably you have seen many of the videos available out there on YouTube where they show one and the same thing, how to capture the movement of the mouse, record it, synchronize it, make it faster and it clicks where you click the first time.
I was watching those videos for quite a long time and I was opening the next one hoping for a better solution and then I looked for the next one for a better solution and then I clicked on the third, fourth, fifth, all the same thing. How those YouTubers are recording the same thing that someone already recorded and they’re just repeating it. I have mentioned that this is one of the solutions in the very first lecture of these NFT series where I have described the whole process of how to build up the idea, design, create and generate and upload the NFTs to OpenSea and I mentioned that method as one of the simplest solutions out there but I wasn’t happy with that.
So I’ve spent a lot of time, I honestly don’t know how much time I have spent on that, and I asked one of my best friends to help me out, so I’m super thankful to him and he came up with a solution that is fully automated. No recording of the mouse movement, it’s ready to use code. I don’t know from where he came up with it but I’m super happy to share that method with you because it is really unique. I’m super excited to show you how to upload 10000 NFT items to OpenSea automatically.
Installing the NFT upload application
Now I’ll show you how to upload 10000NFTs to OpenSea and put them into a collection. For this purpose, I will download a project from GitHub which is open-source, everyone can access it, the code is written on Python, and by using it we will automatically upload the NFTs on OpenSea.
So far this is probably the smartest solution so you won’t need to record the movement of the mouse and wonder if you did something wrong or not and you won’t need to copy the titles from an Excel sheet. You will see it it’s super easy – a few things to be done, one button to click and you will see how the NFTs are being uploaded one by one. Here is the link to the repository code on GitHub. Once you click on it, go to Code and click on Download ZIP.
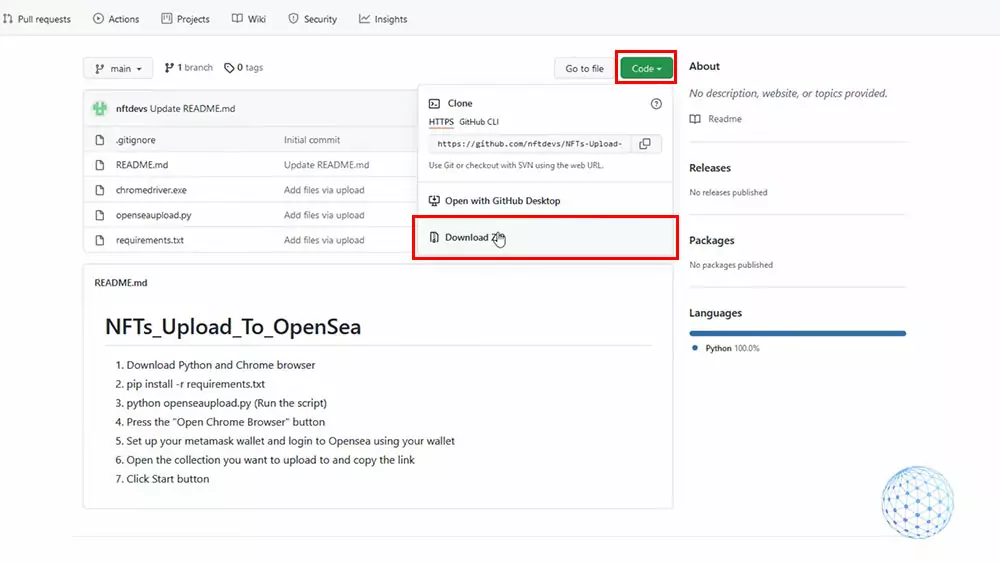
It is ready to use code so we won’t do any programming but you will need Python and Chrome browser, so if you don’t have one just write in Google ‘Python download’ and click on the first link you see and download it accordingly to your operating system and once the code is downloaded you need to unzip it.
Then I will just right-click on the downloaded zip folder and click on Extract All. This will extract it and once I have the extracted folder I will open it on the command prompt. After that, we need to execute all the commands from the repository.
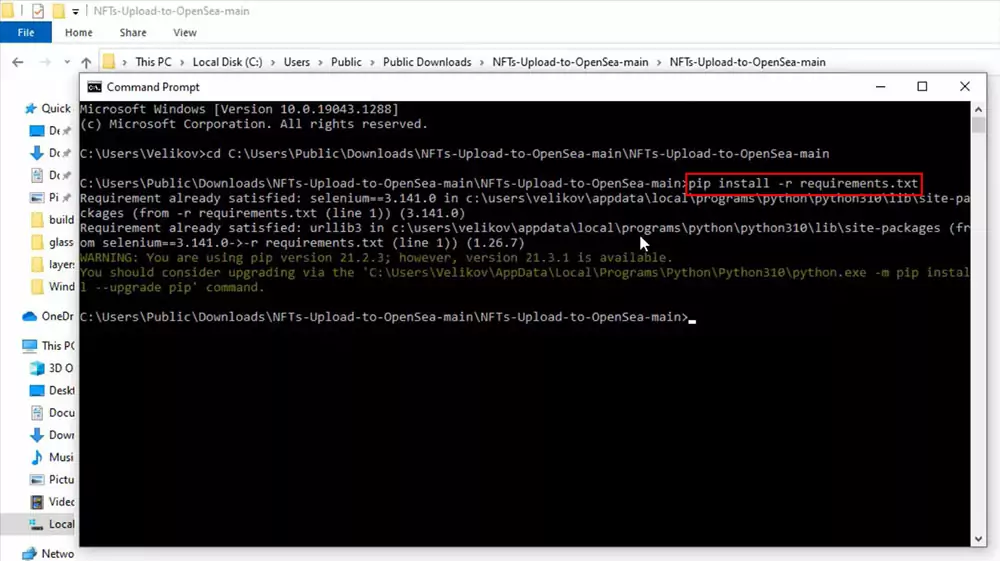
So just copy-paste them in the command prompt. This way, you will be sure that you won’t make any mistakes and you won’t have any errors. Just hit on enter and all the dependencies will be installed and then you will need to run the script, this is by copy-pasting ‘python openseaupload.py‘ in the console. So again go to the repository copy it, open the command prompt, paste it hit on enter. This is the program that you will be using to upload 10000 NFTs on OpenSea and it’s super easy actually to do it.
Configuring the NFT upload
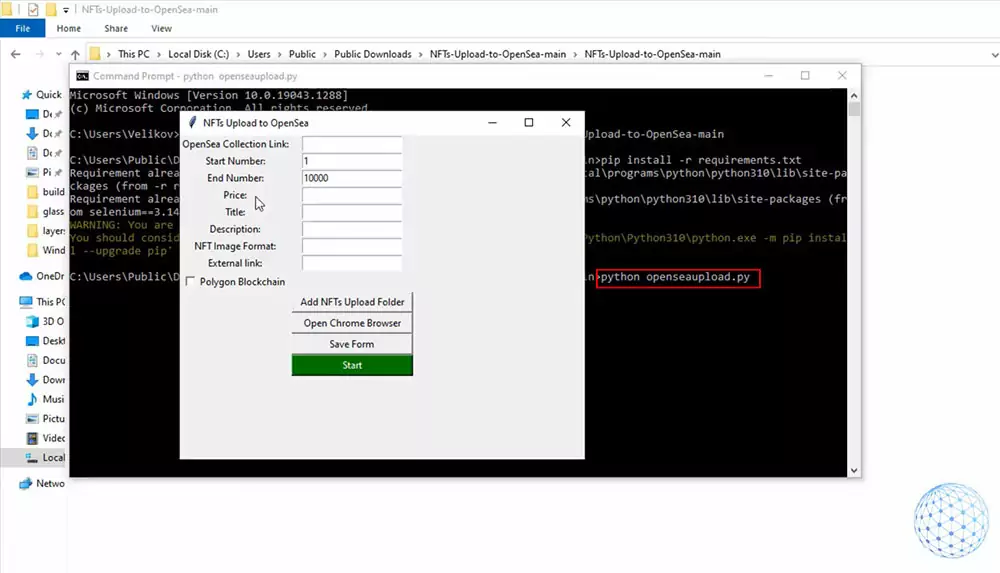
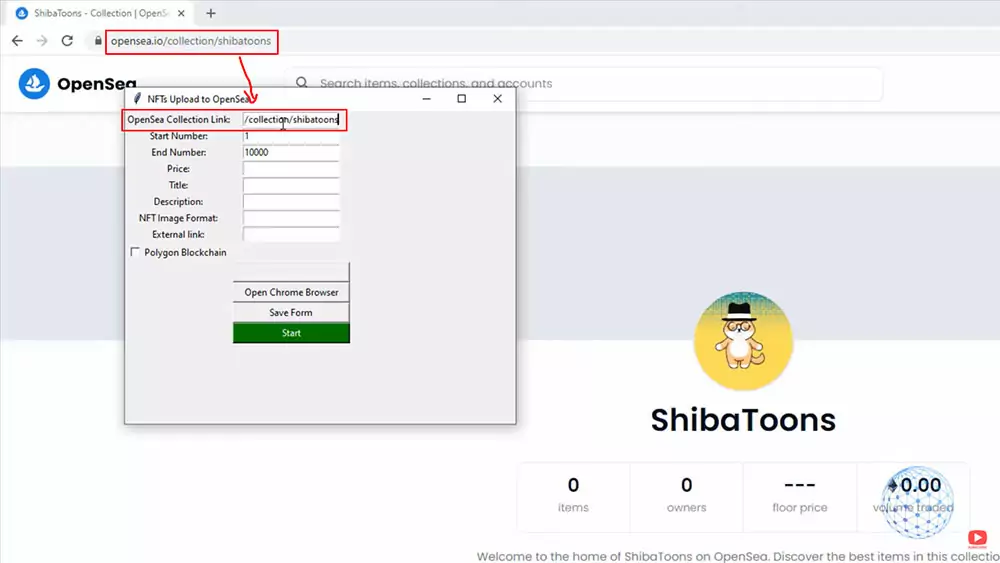
First you need to paste the OpenSea Collection Link. This is the link to the collection. Then you have the Start Number and the End Number or if you have from 1 to 10000 with our example. You need to write down one and then in the end number select 10000. It really depends on how many NFTs you have to upload. Then you have the Price, the Title, the Description, the NFT Image Format, we have the External Link and below we have the option to choose if we want to upload the NFTs to the Polygon Blockchain or not. So if you select to check that, it means they will be uploaded and created on the Polygon Blockchain.
Below we have the option to add the NFT upload folder or to select the path to where the NFTs are located and we have the buttons to run the program. One thing to mention that is quite important in order for the program to run successfully is the NFT images that we have in the build folder must be numbered from 1 to whatever number you have. In my case it is from 1 to 10000 because this is how many NFTs I have generated.
Connecting to a MetaMask wallet
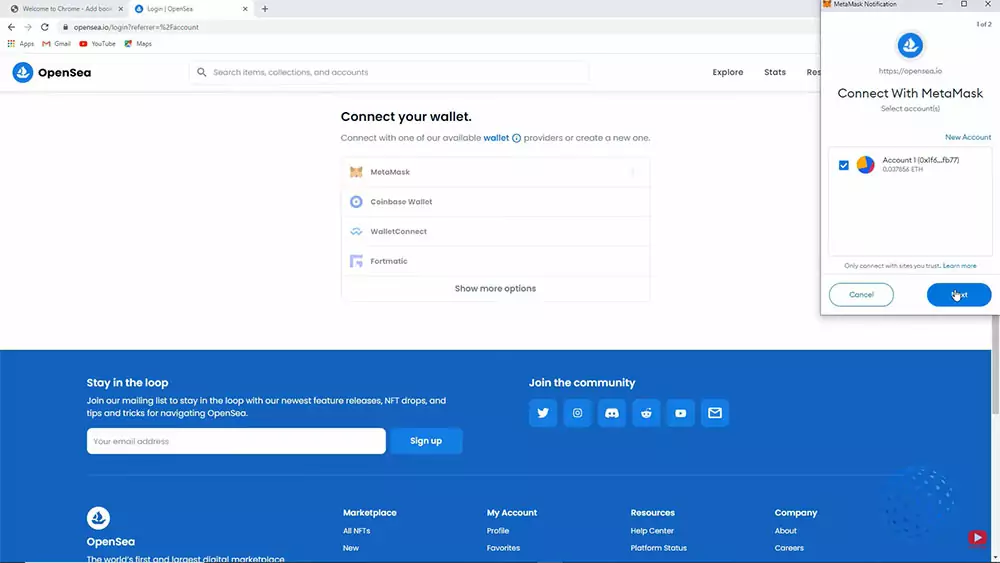
Now going back to the NFT upload program. First thing to do is click on the ‘Open Chrome Browser’ button and once it opens the browser you will need to connect it to MetaMask wallet. If you haven’t done that I will show it very quickly.
I will add the ‘MetaMask for Google Chrome’ extension to the browser and import the wallet. Once you are logged into your MetaMask wallet, open the website opensea.io and then just connect the wallet. I will click on profile and I will select MetaMask, after that I will click on Next and I will click on Connect.
Once it is connected I will be into my profile page. You will see the NFTs that I have so far.
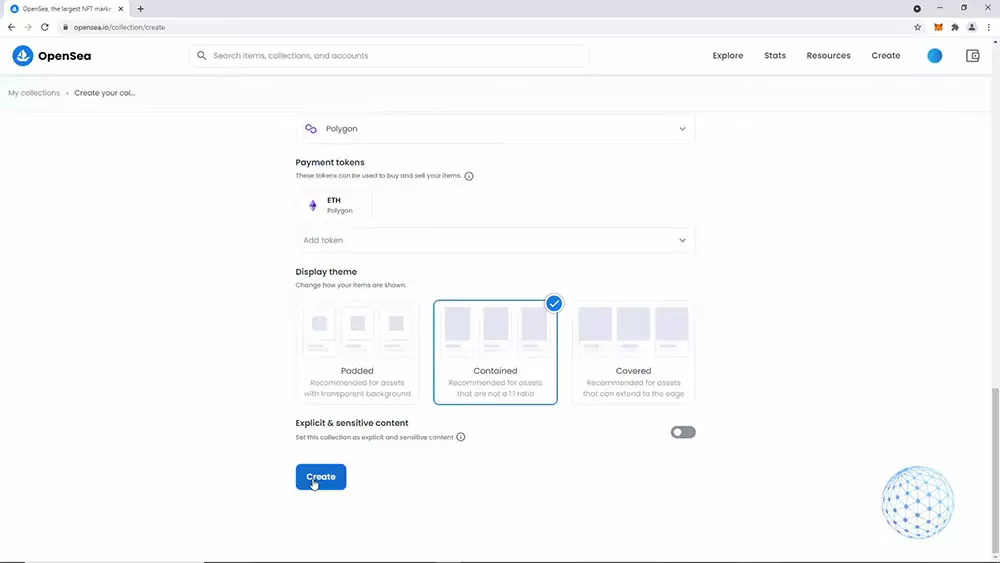
So now I will go to my collections and I will create a collection for a logo image. I will select any of the images that I have for the NFTs upload, I will leave empty just the name of the collection, I will write down ShibaToons and you will actually notice that a lot of names are already taken so you have to find a free one. As a Blockchain I will select Polygon and I will hit on Create so the collection is created.
After that, I will open the program and the first thing I need to paste is the link to the NFT collection. So just copy the link to the collection I just created I will paste it.
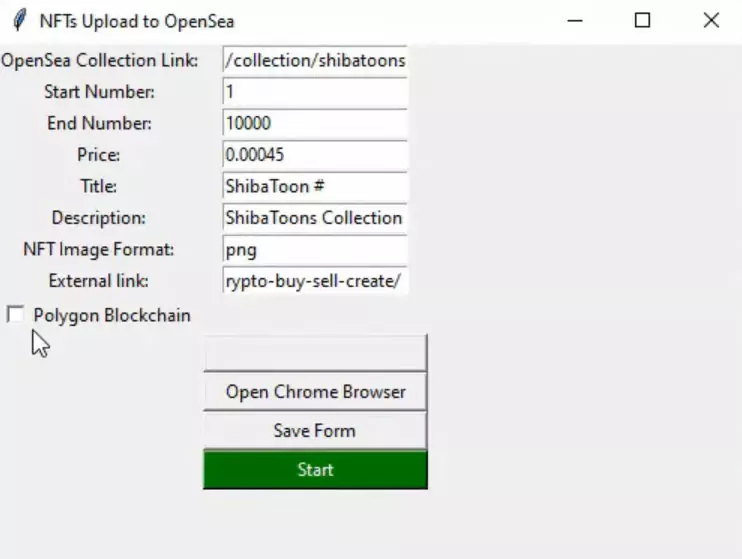
Then as a Start Number and End Number I already explained that for me it will be from 1 to 10000. The minimum Price at the current moment for OpenSea is $2 or that is around 0.00045 of Etherium. The title is ShibaToon and number. So once it starts to create the NFTs the first one will be with the title ShibaToon number 1 and the second one will be ShibaToon number 2 and so on until the last NFT ShinaToon number 10000.
Then we have the Description, I will write down ‘ShibaToons collection’ and then for NFT Image Format, it really depends on what your format is, but if you’re not sure you can go over the image click on properties and you will see the type of file. In my case, it is .png so I’ll just type ‘png’.
Then we have the External Link. Here you can to place the project website where you have the roadmap and everything about the NFT itself but in my case, I will drop a link to my NFT course because I want everyone who buys an NFT from my collection to see the course if they want to learn more about the NFTs. For Polygon Blockchain, I can leave this setting unchecked because when I was creating the collection on OpenSea, I selected the Polygon Blockchain by default. So all the NFTs will be created on the Polygon Blockchain.
The last thing is to select the folder where are all the 10000 images. I will click on the Select folder and pretty much that’s it.
So now let’s start creating those NFTs and the only thing you have to do is to hit the green Start button. It is simple as that and you will see the first NFT being created. It all happens automatically. I’m not moving my mouse. You can see that the external link is written the description.
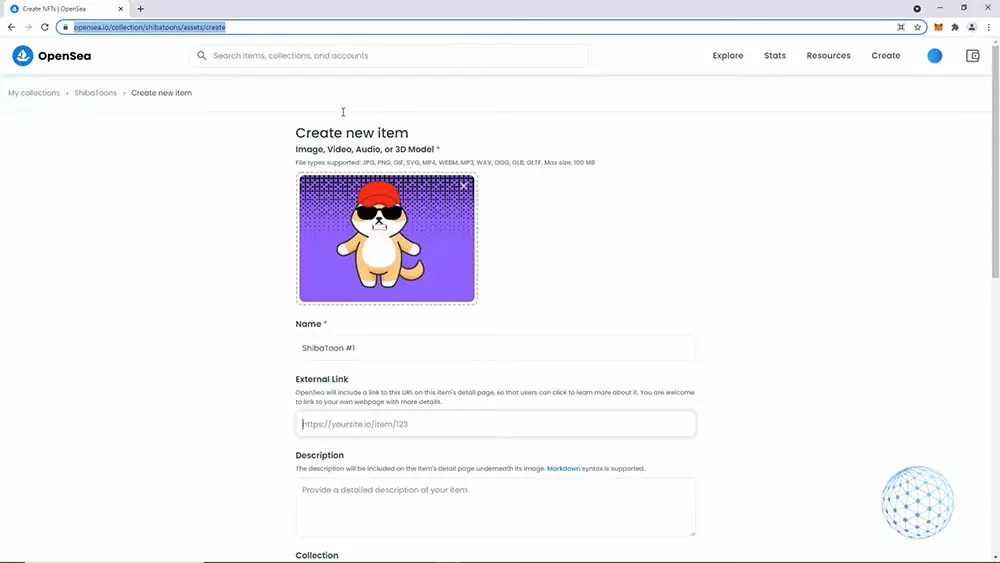
Obviously it will take some time for the site to load the image or to complete the listing and to click on the sign message as well to connect to the MetaMask wallet and to sign it. So all of that happens automatically and here it is the first NFT was listed.
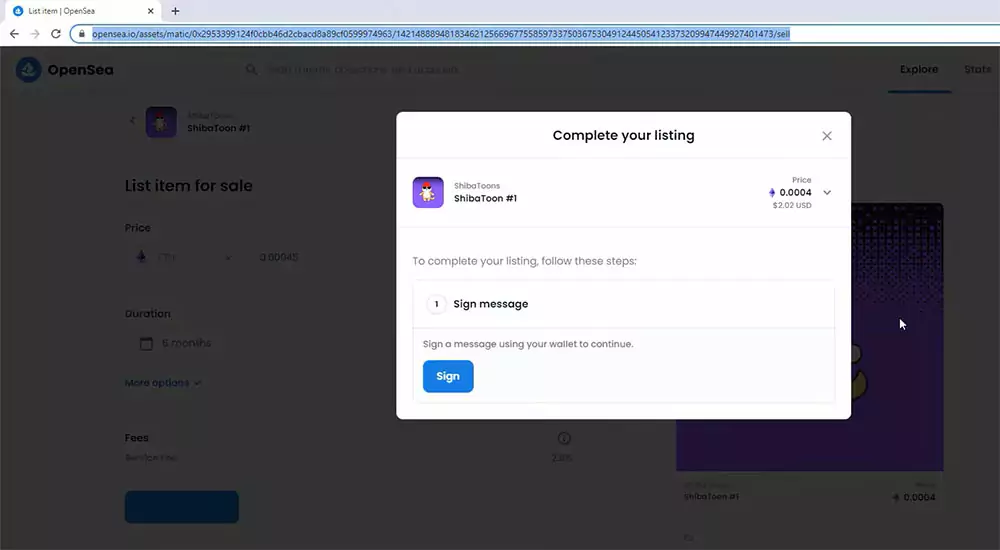
Then it goes back, it clicks automatically to the bottom of the item and then it uploads the second one. The name is Shiba Toon number 2, the external link to my NFT course, the description and it is about to create the second NFT ShibaToon number 2. It writes down the Price, everything happens automatically, it’s just awesome because it clicks automatically to all buttons, it uploads automatically the pics, it connects to the MetaMask wallet and as you can see my mouse is not moving.
You will be easily uploading your 10000 NFTs on OpenSea without the effort to upload them one by one or to record the movement of your mouse. This took me such a long time to figure it out and it is worth sharing this method with you. I hope you will really find that useful because as I said so far this is the best solution I have found and actually I’ll be super happy if you guys share your thoughs in the comments bellow. This means a lot to me and spending my time looking for that method will be really worthwhile.
The best thing I actually forgot to mention is that while the program creates all of these NFTs and uploads
them automatically on OpenSea, I can use my computer. It will just run on the background doing its work.
Obviously, it will take some time because we cannot make it faster as it takes some time for OpenSea
website to load the pictures, to click the buttons, or to sign to MetaMask. You have to be patient and just enjoy watching how your NFTs are being created automatically now I will leave it recording for some time and I will show it quickly for the first 30, 40 for example.
Thank you for reading this lecture. I hope you have found the NFT beginner series useful